
Introduction
This manual is designed to provide you with detailed instructions for using the Verifone Trinity
payment terminal and the PayAtTable application. This guide simplifies the payment process in your
restaurant, offering speed, security, and efficiency for every transaction.
In the following sections, you will find step-by-step instructions on how to set up and operate the
payment terminal, as well as useful tips to solve common problems.
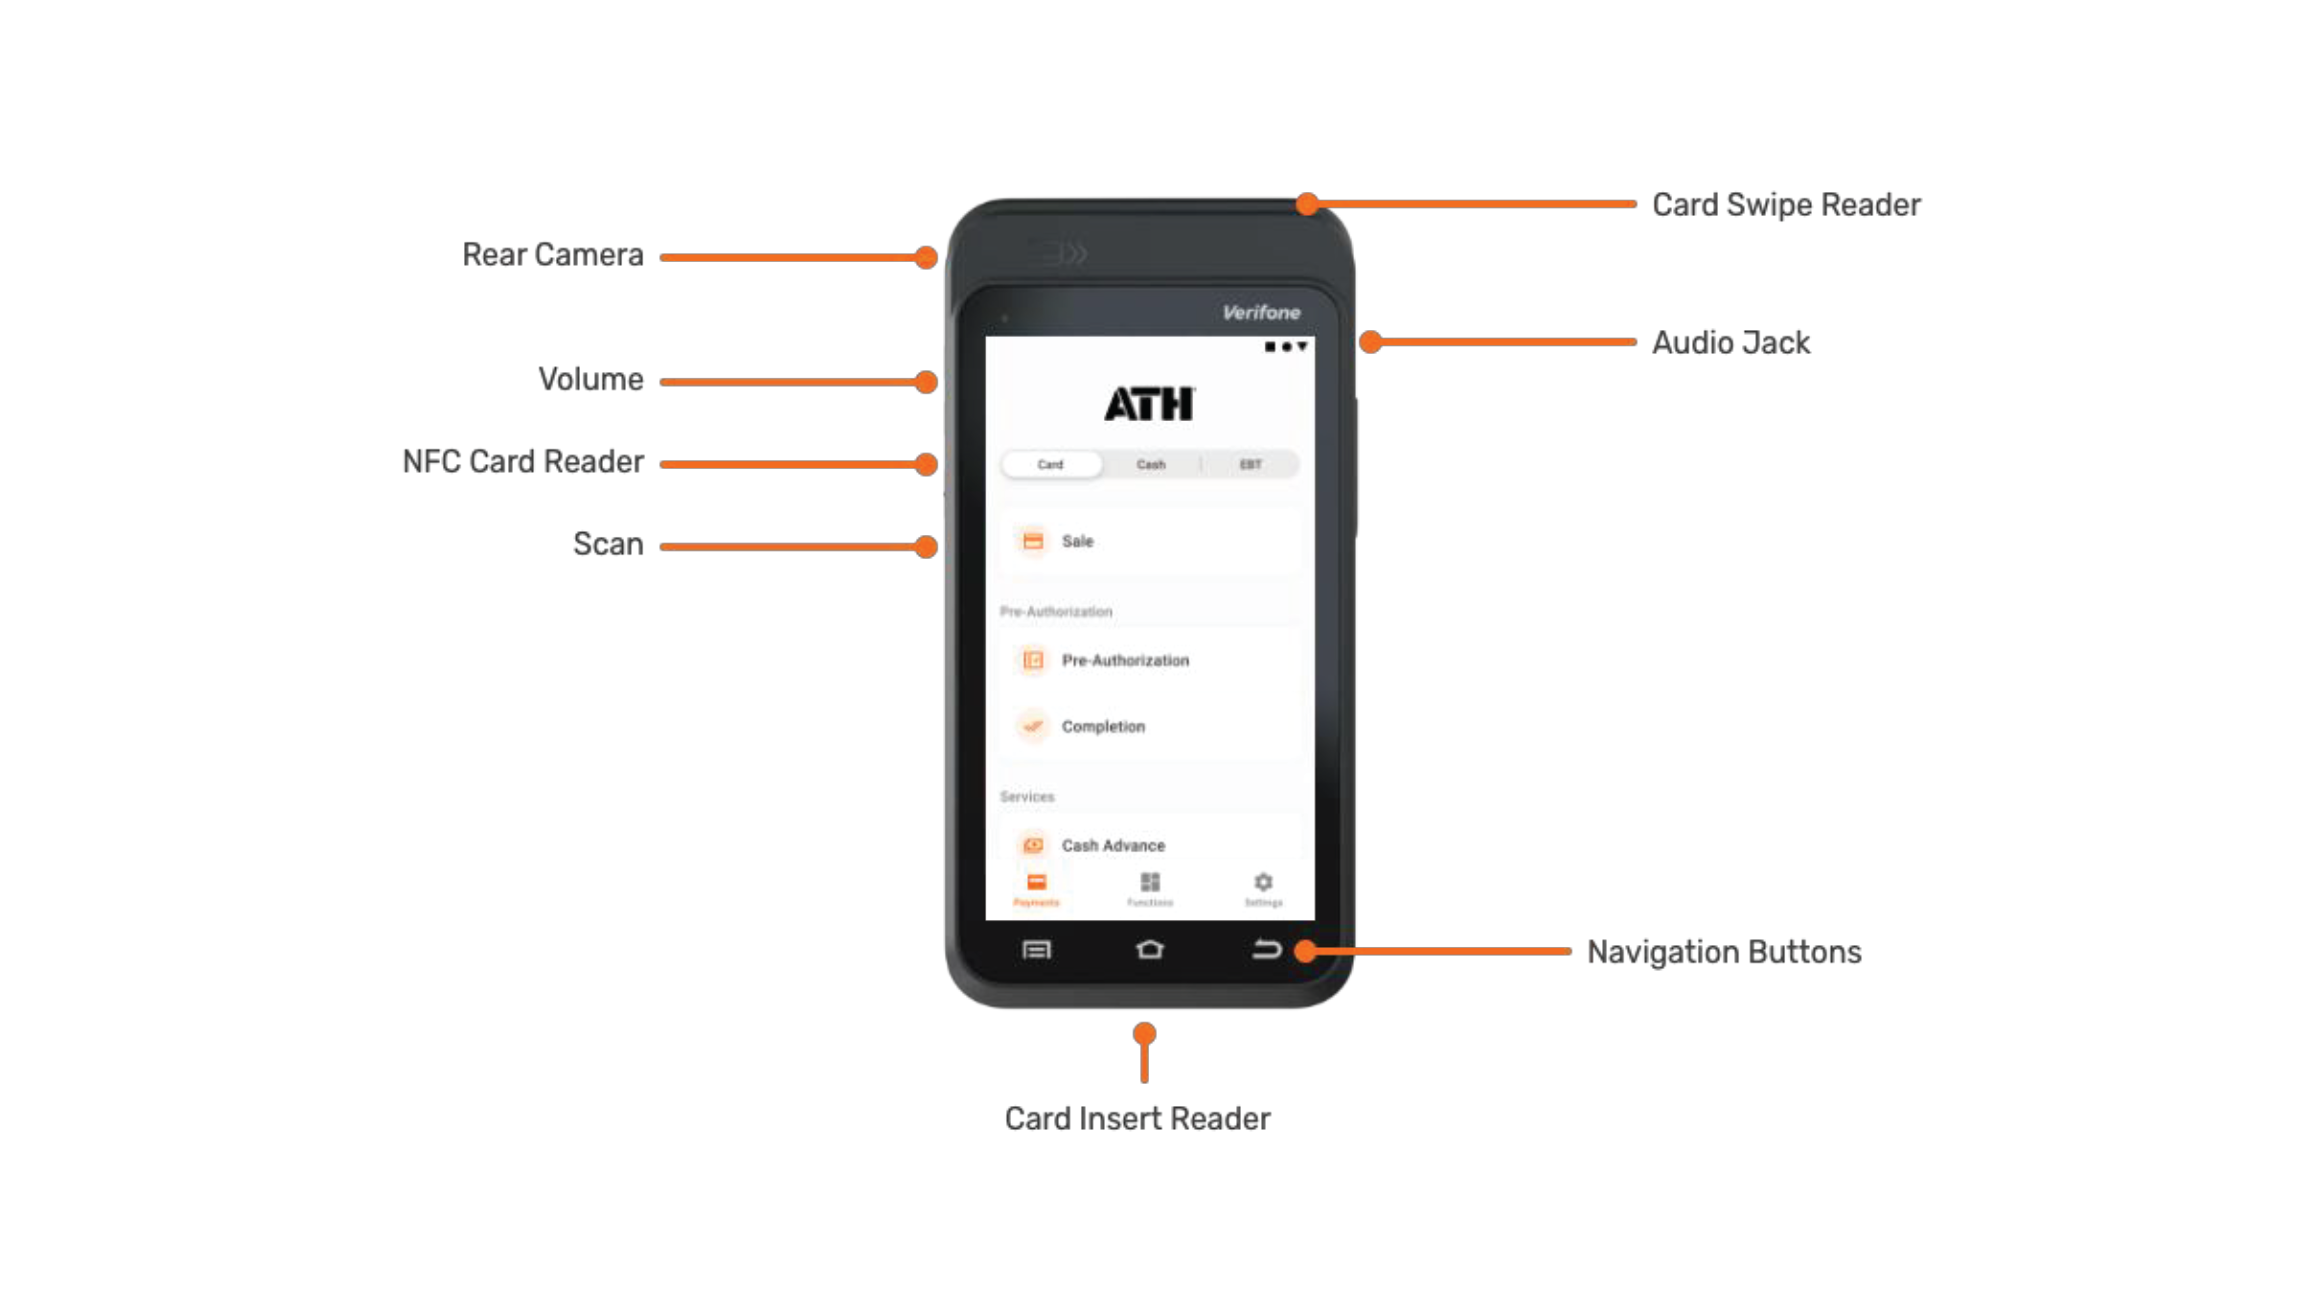
Terminal Features
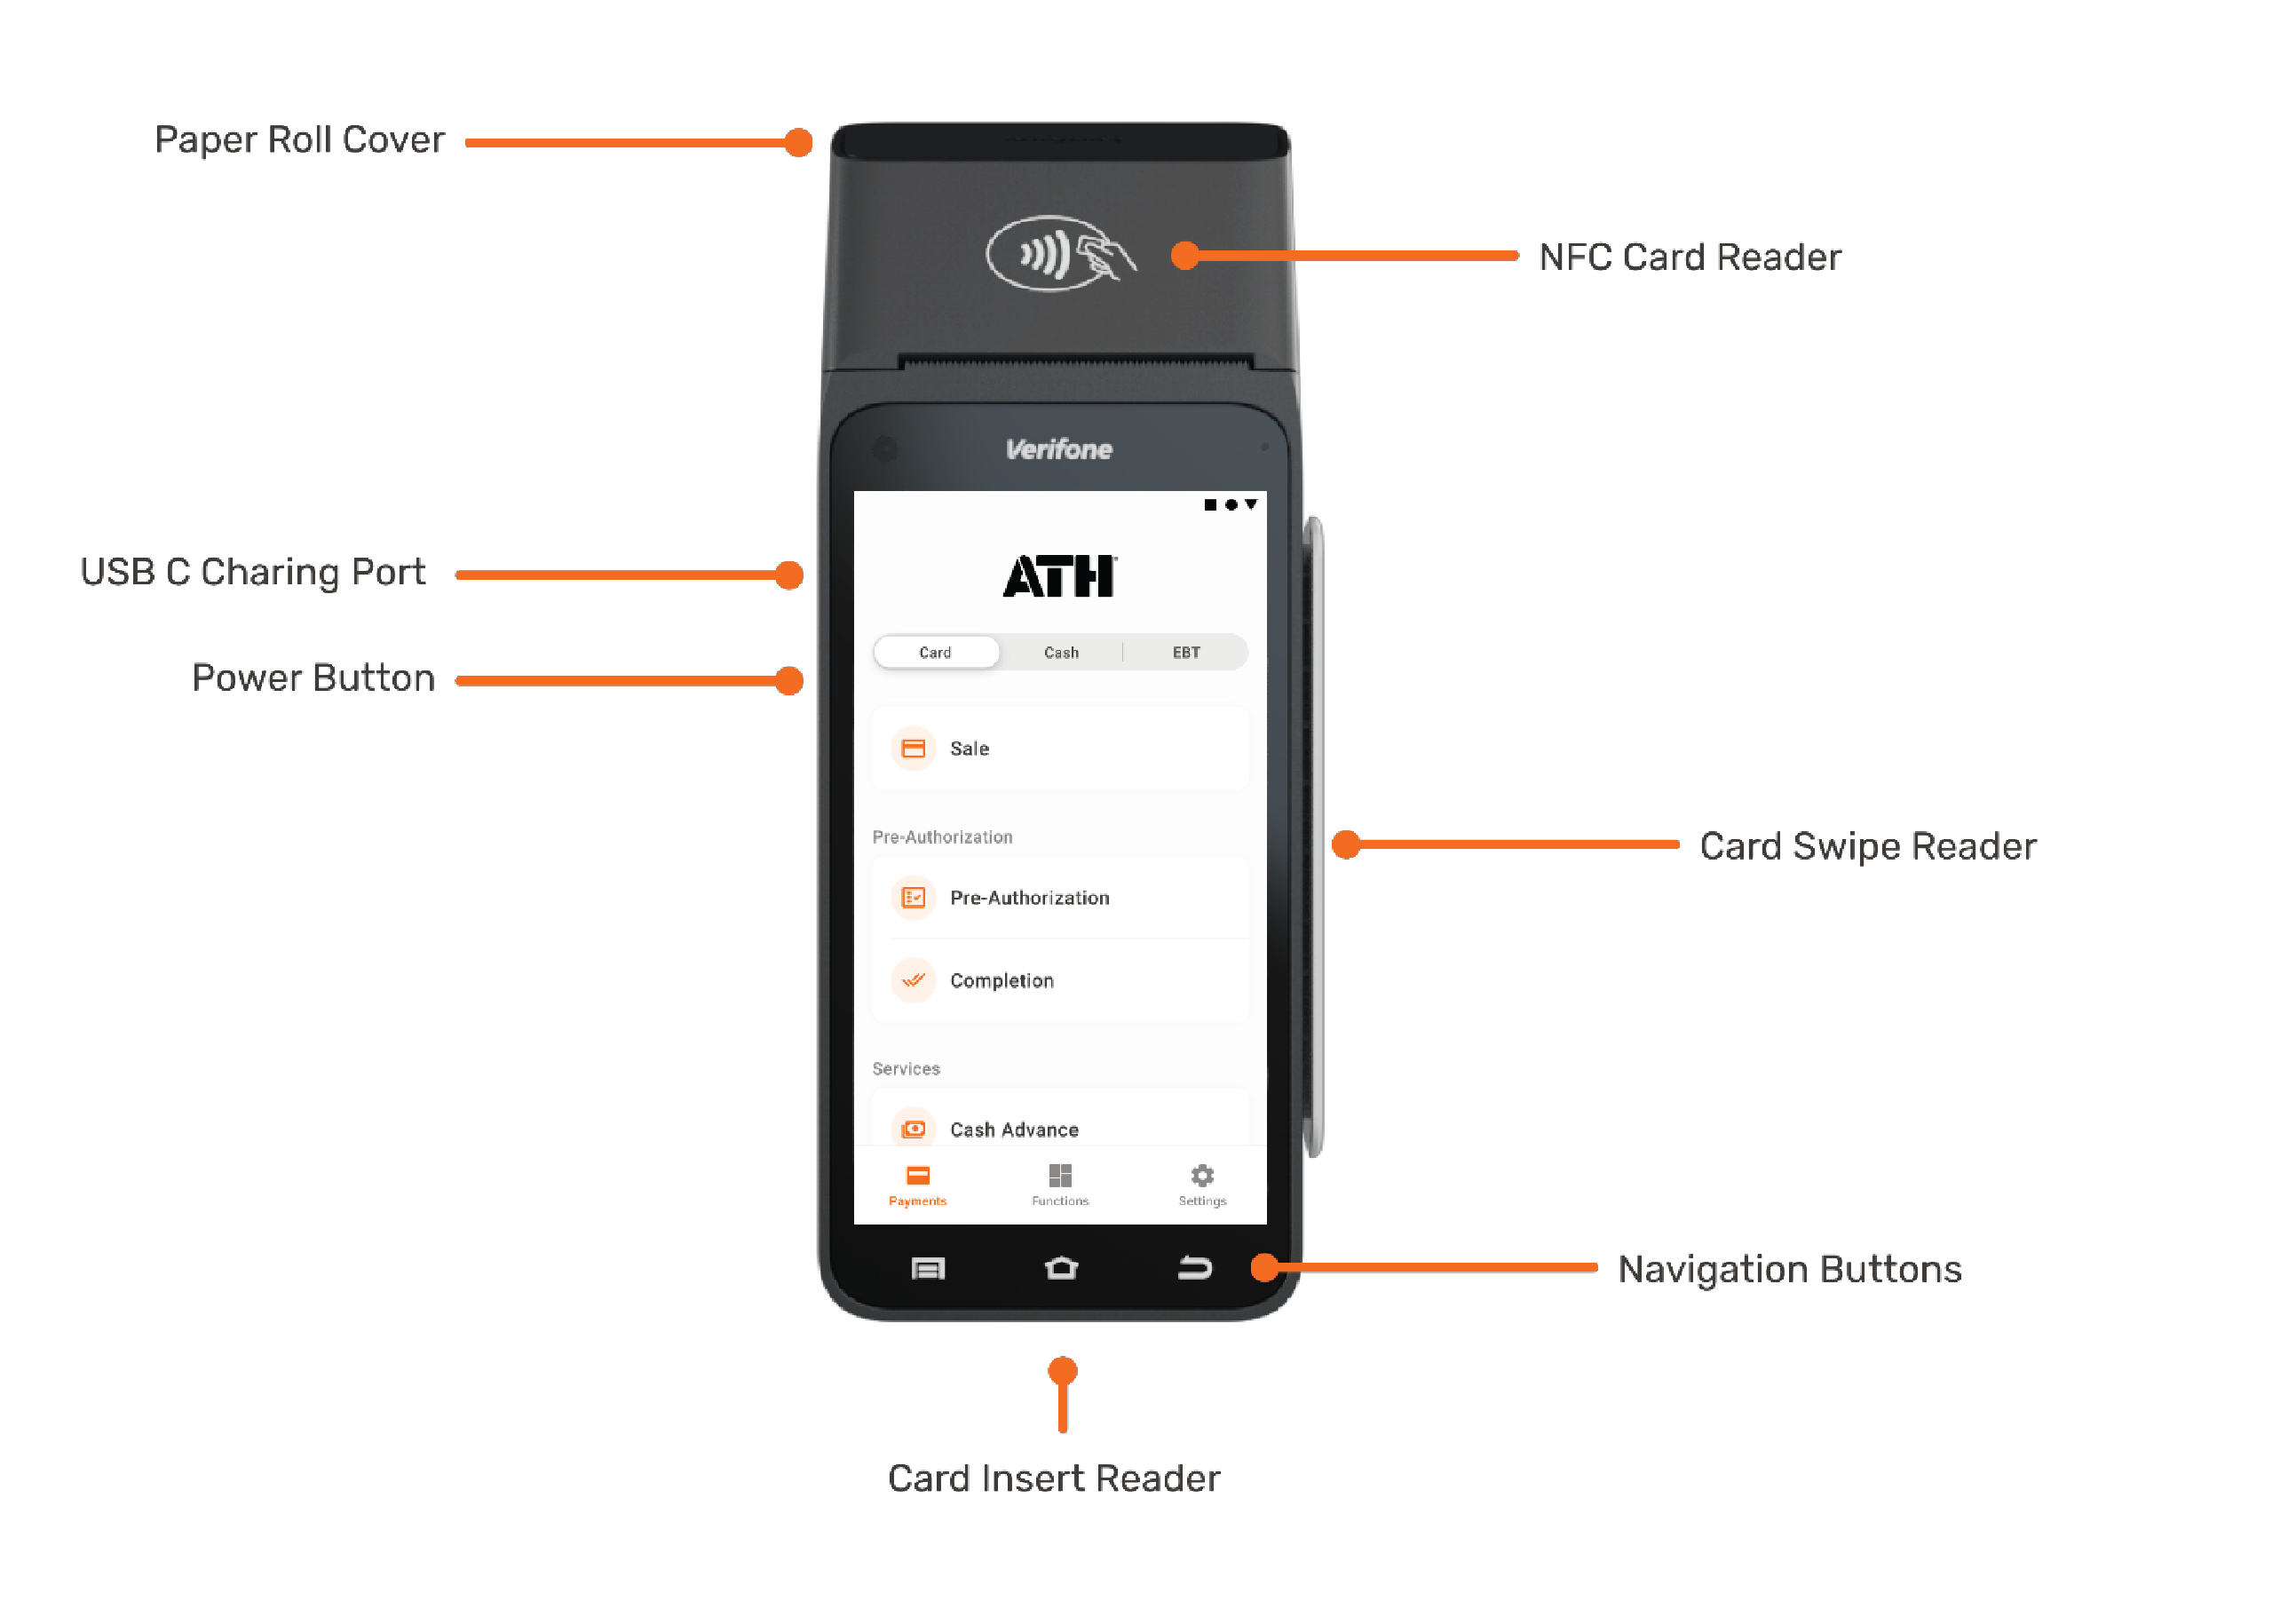
Paper Roll
Some of the features of your Point of Sale (POS) terminal depend on the availability of paper for printing receipts. When the terminal runs out of paper, it will not process any more transactions until the paper roll is replaced. We recommend monitoring the paper supply regularly and maintaining a sufficient inventory of paper rolls for receipts to avoid disruptions to your business operations. To order new paper rolls, please call us at 787-751-1401.
Follow these steps to replace the paper roll in your POS system:

- Hold both sides of the paper roll cover located on the top of the device. Pull the cover outward to open it.
- Hold the roll so that the paper feeds into the device from the top of the roll. Align the edges of the paper with the paper guide tabs and lift the edge of the paper back as you close the cover.
- With the printer paper extending outward, close the printer cover by flipping it back to front until the cover clicks shut, allowing the paper to slide out of the printer cover.
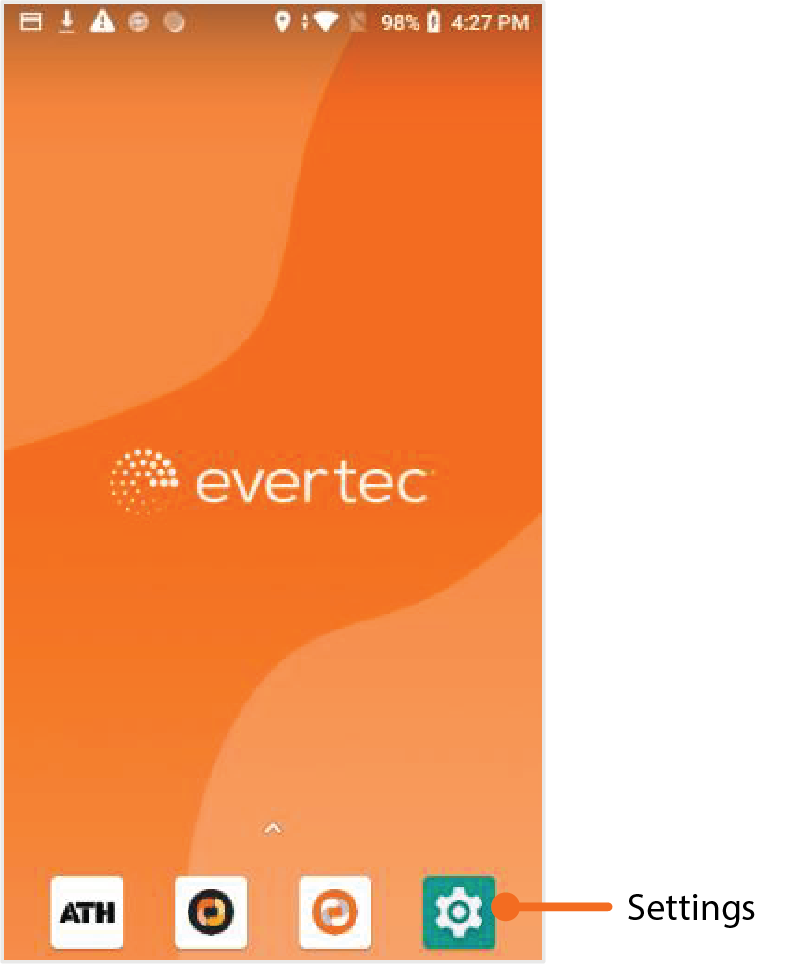
Internet Connection
This POS terminal relies on Internet connectivity, either through a mobile carrier or a Wi-Fi network, to process transactions and sync data in real time. If there is no active Internet connection, the functionality of the terminal will be significantly limited.
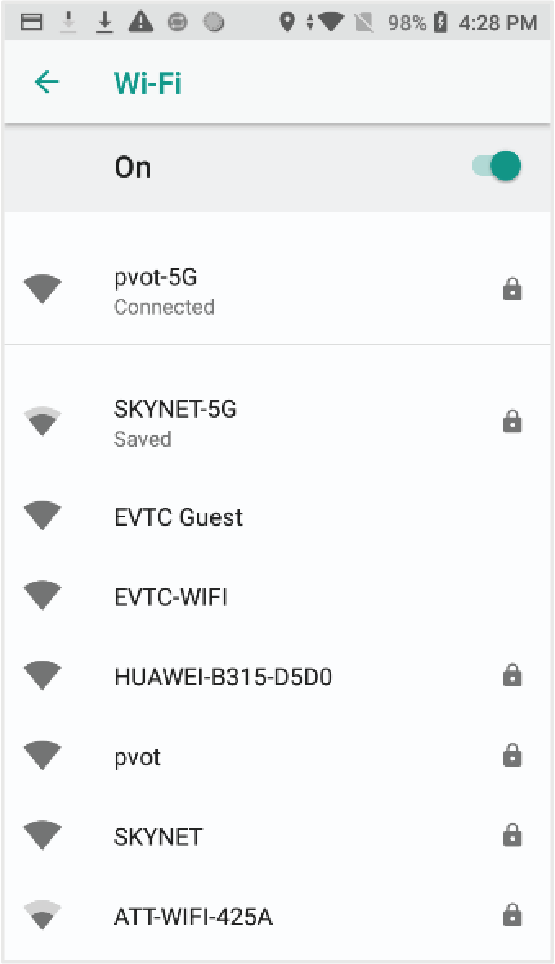
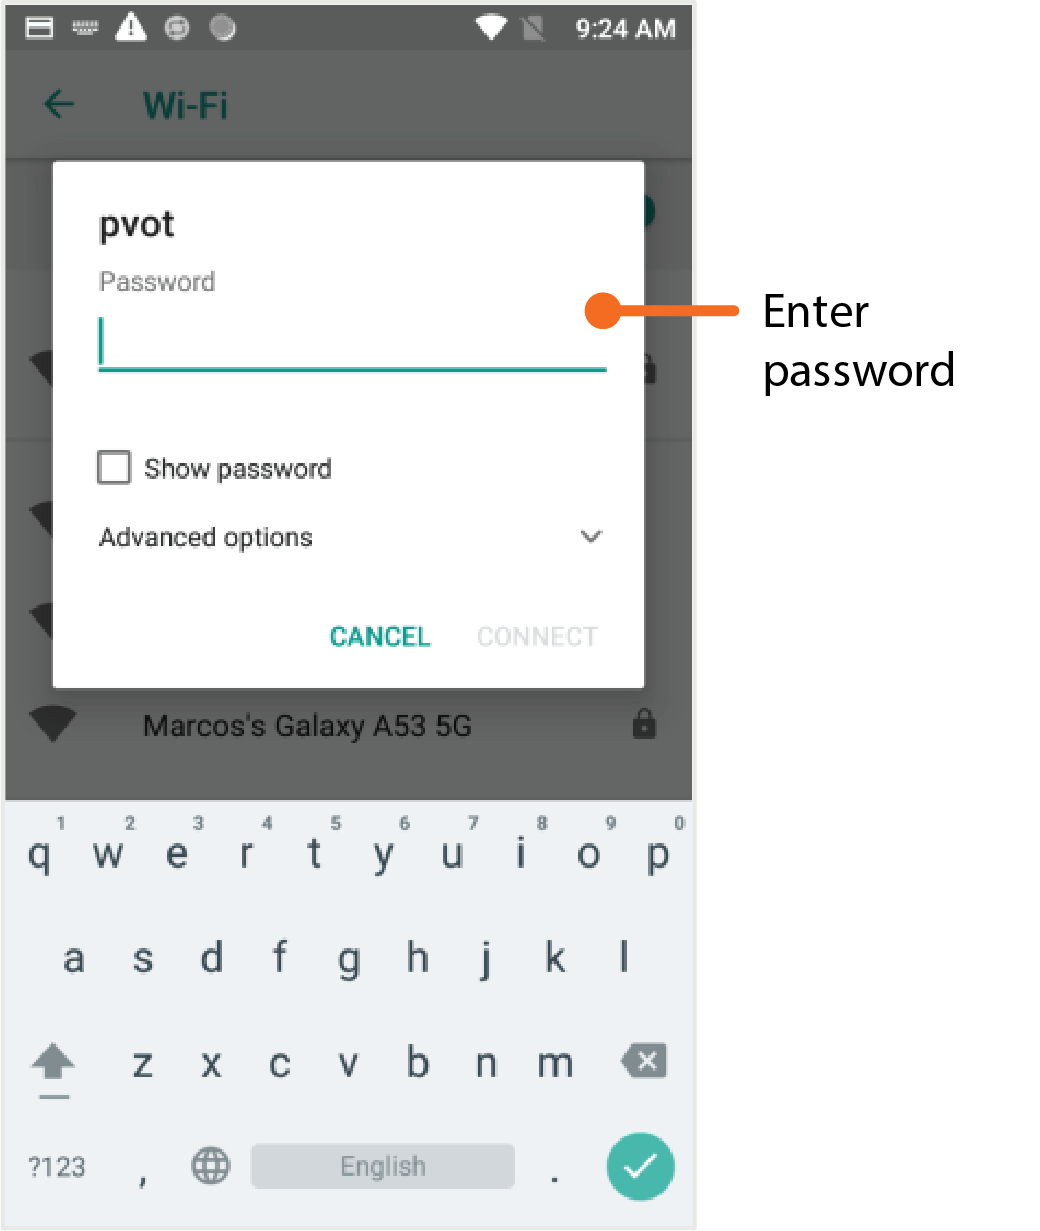
To connect your terminal to a Wi-Fi network:
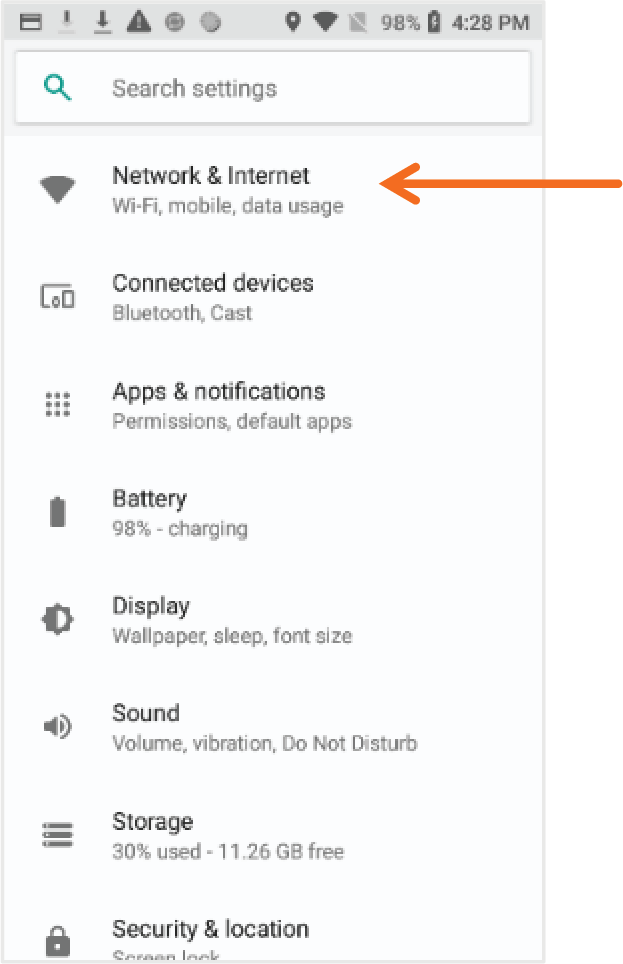
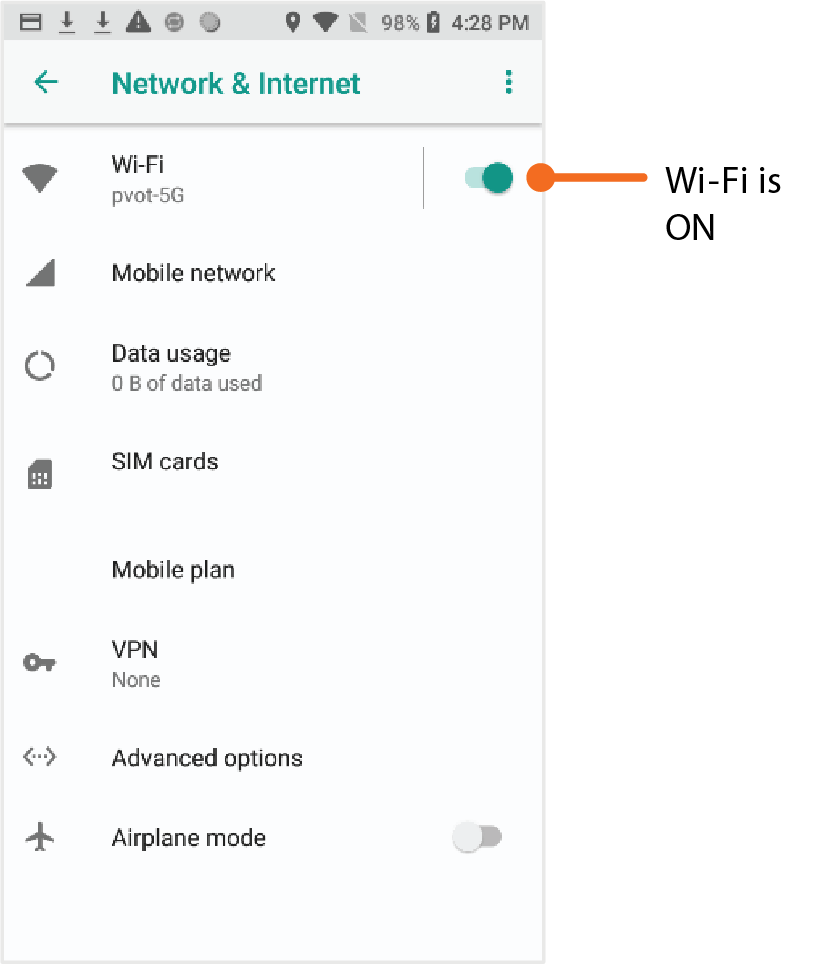
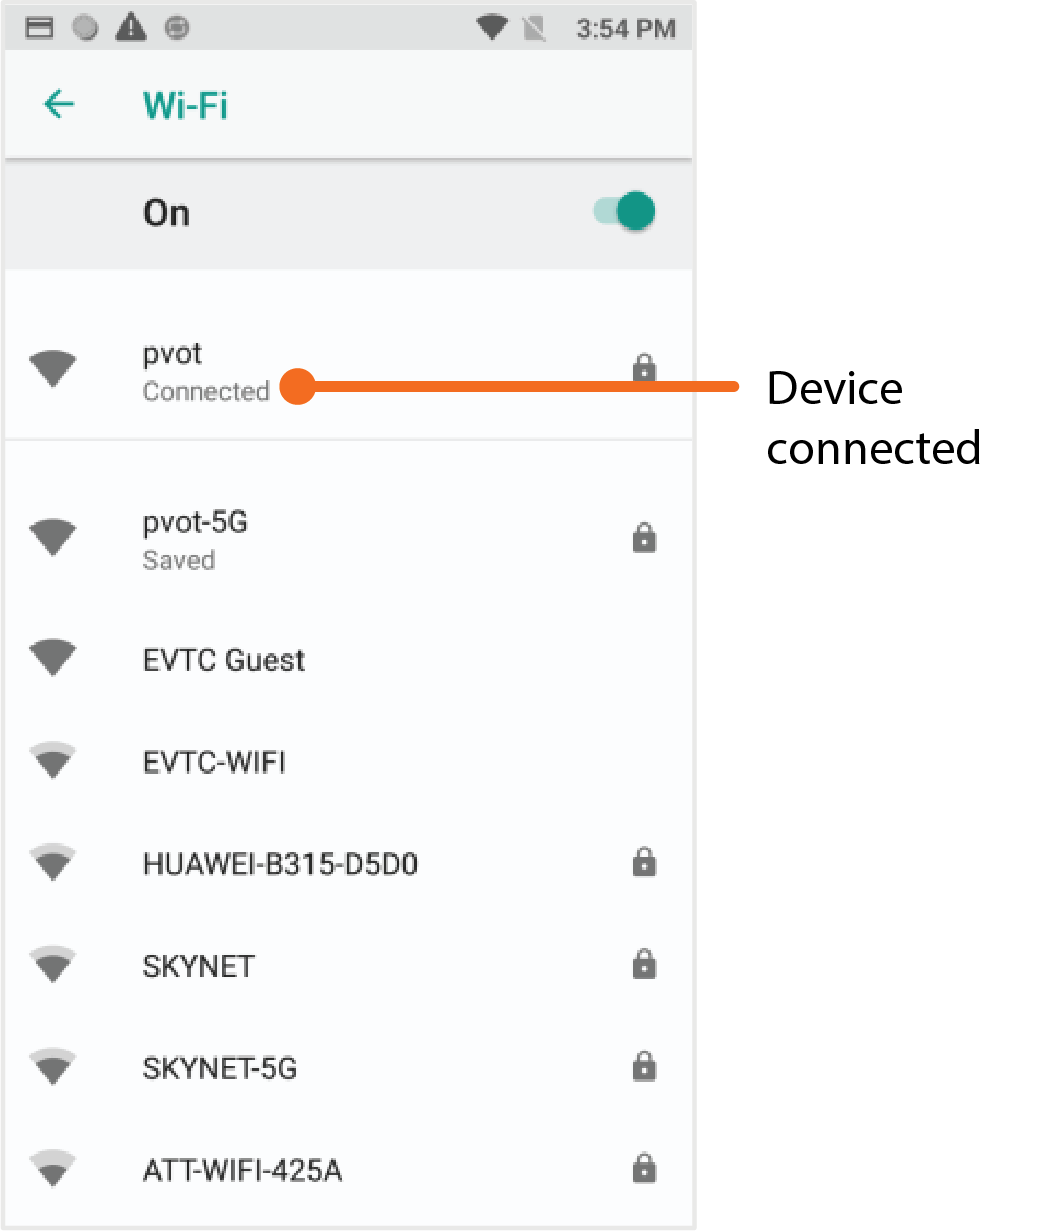
Check regularly to ensure that your terminal remains connected to avoid disruptions to your business operations. If your device is connected to a mobile network, you do not need to take any action or connect it to a Wi-Fi network, but it is still advisable.
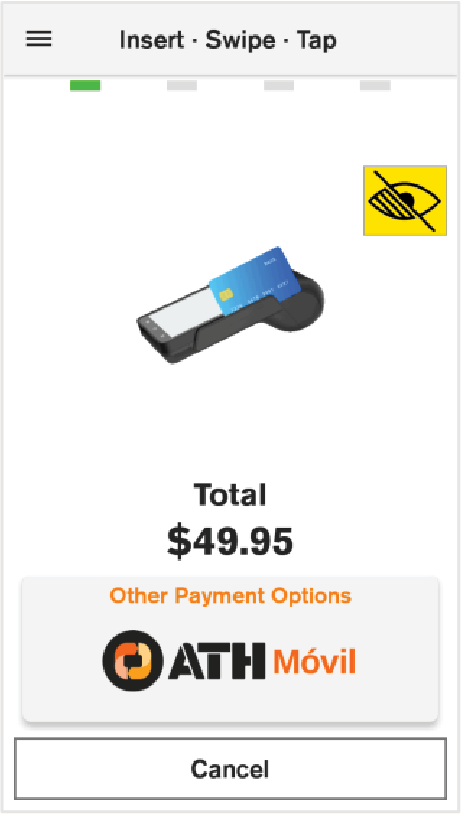
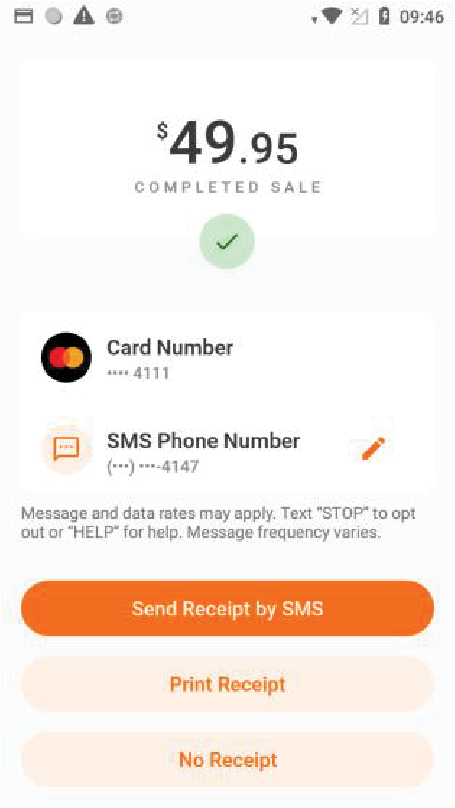
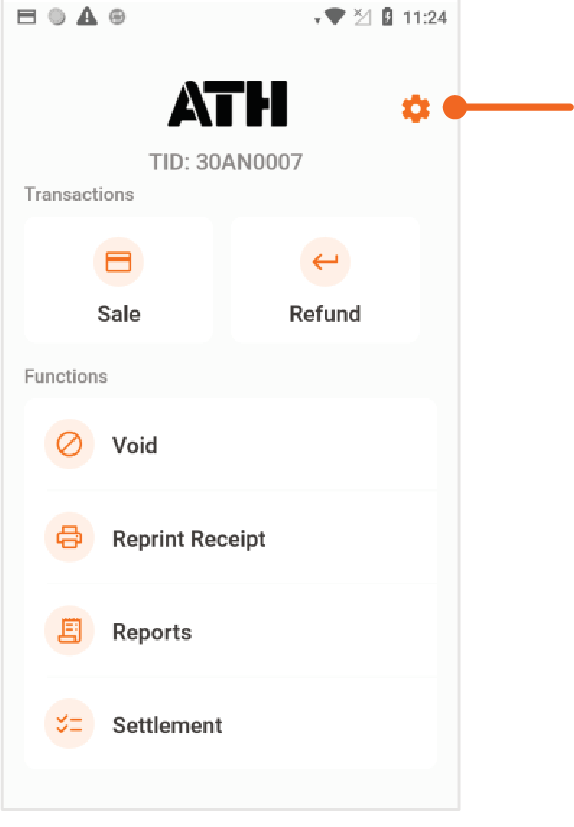
Sale
This section provides information on how to process credit cards, debit cards, split payments and manual sales from the Point of Sale and the Verifone Trinity terminal.
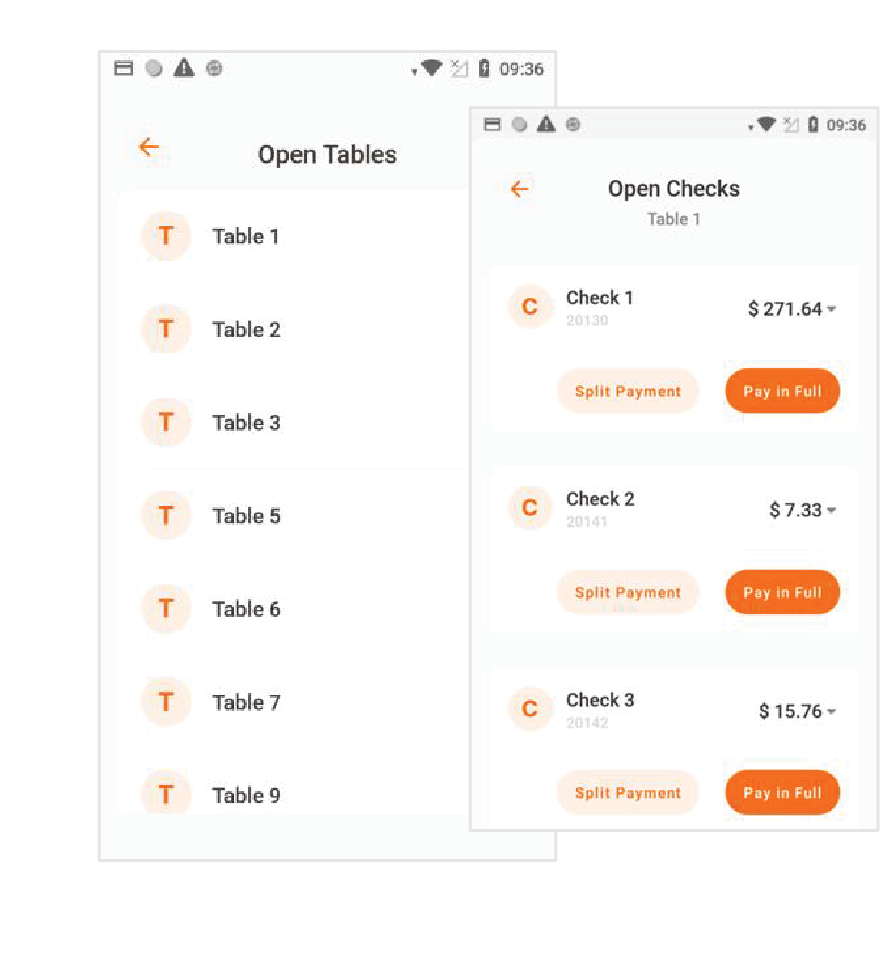
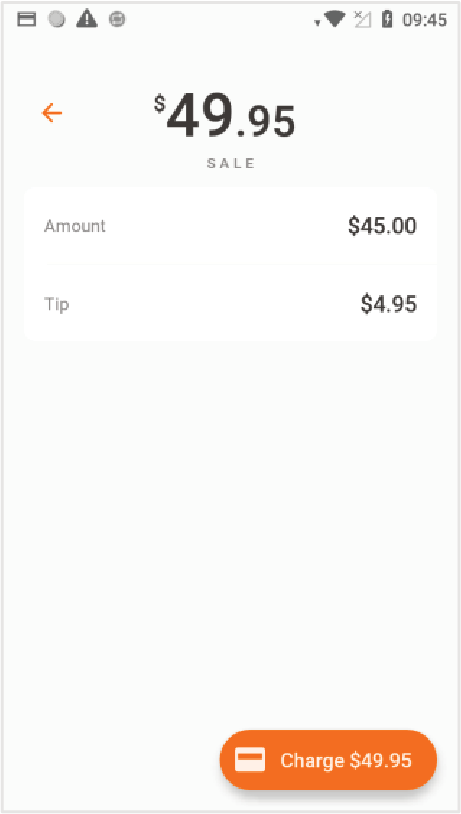
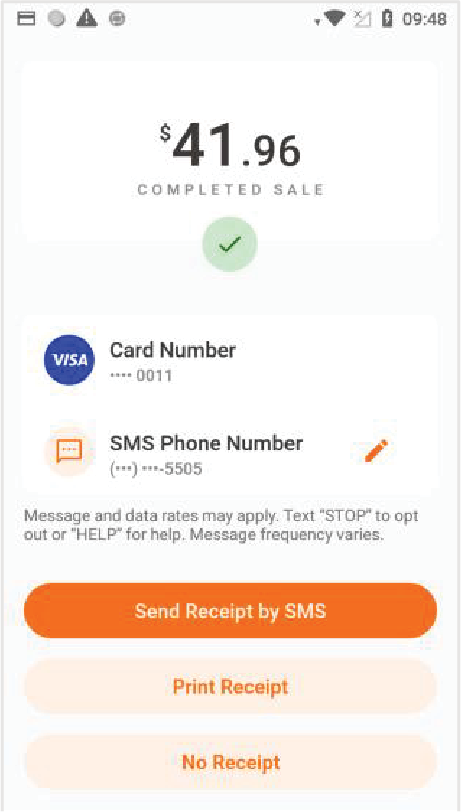
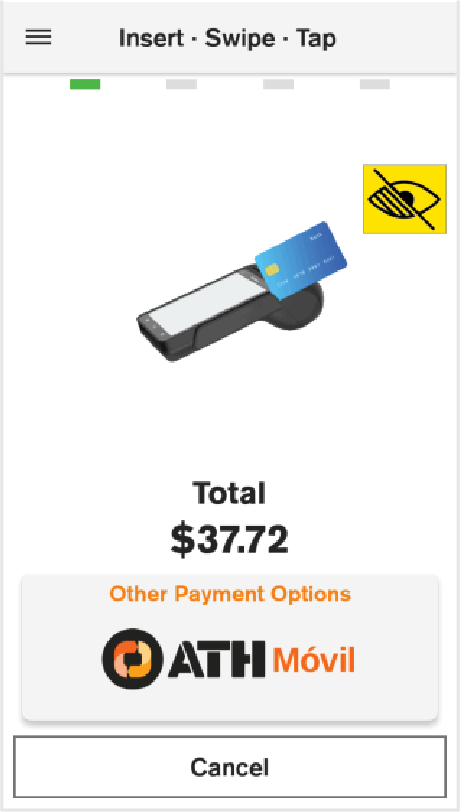
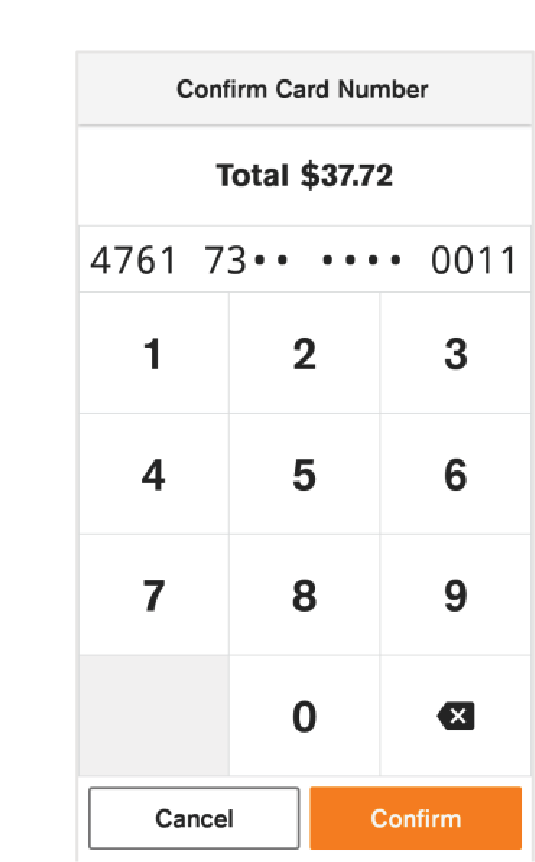
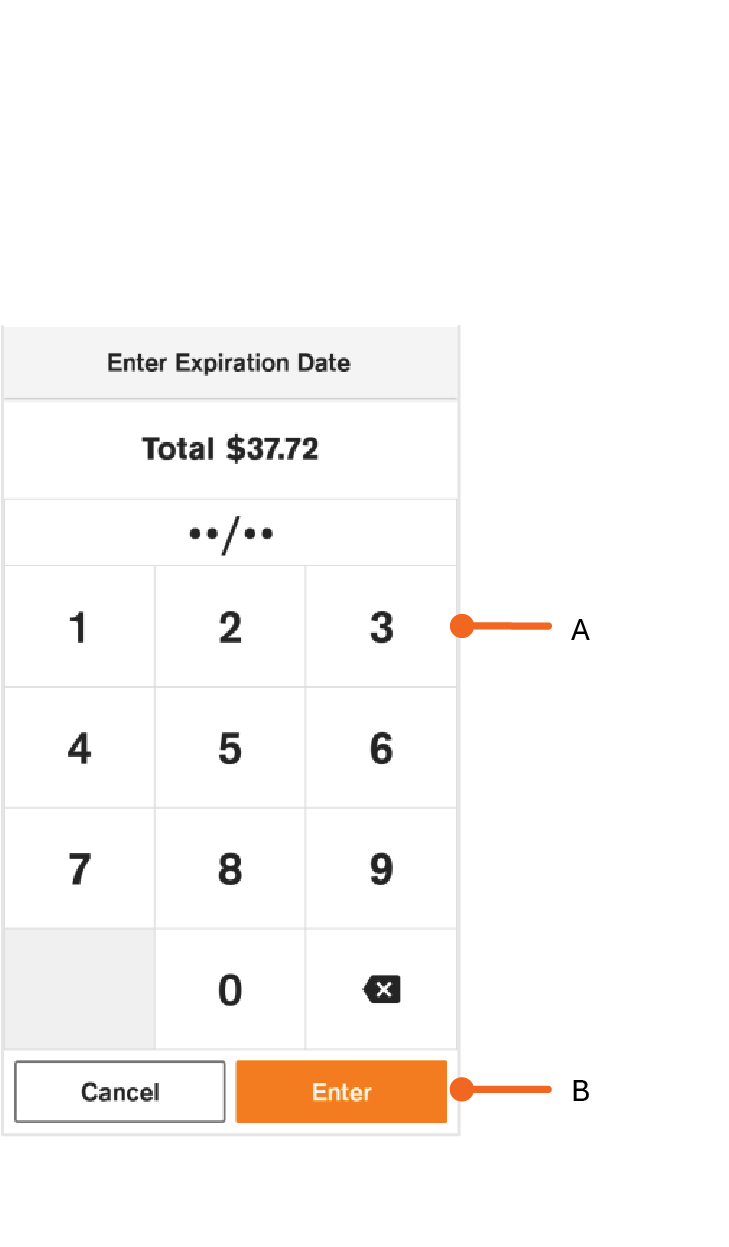
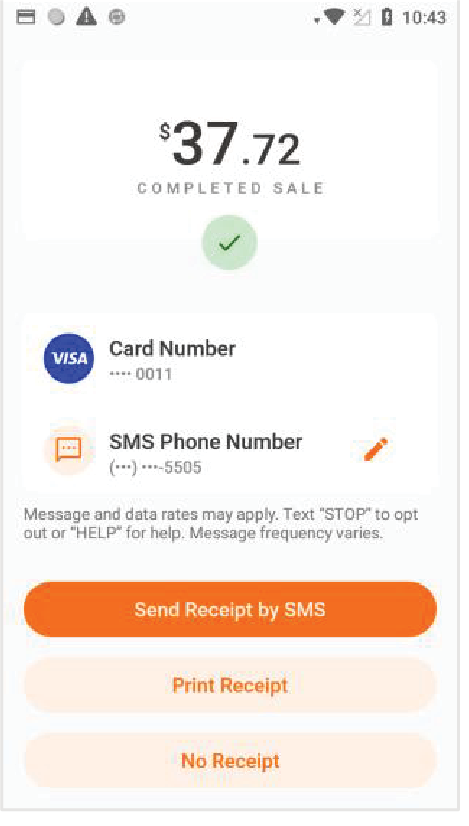
Pay in Full
Below are the steps to submit a payment in full.
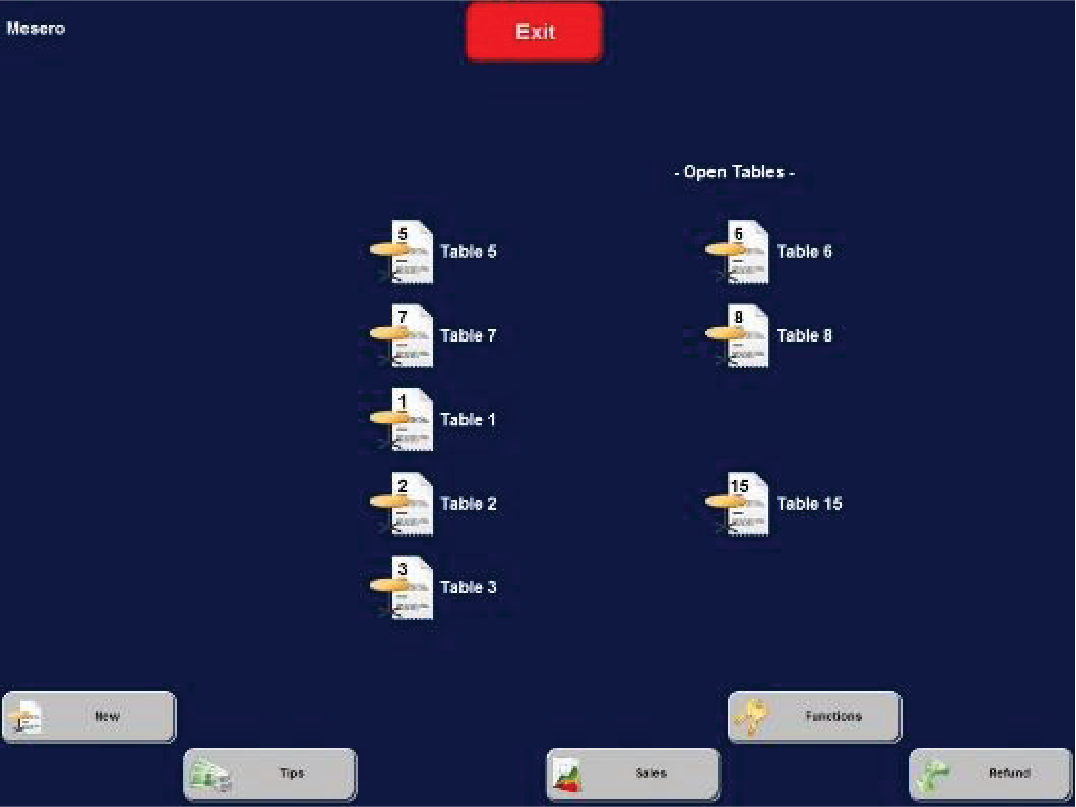
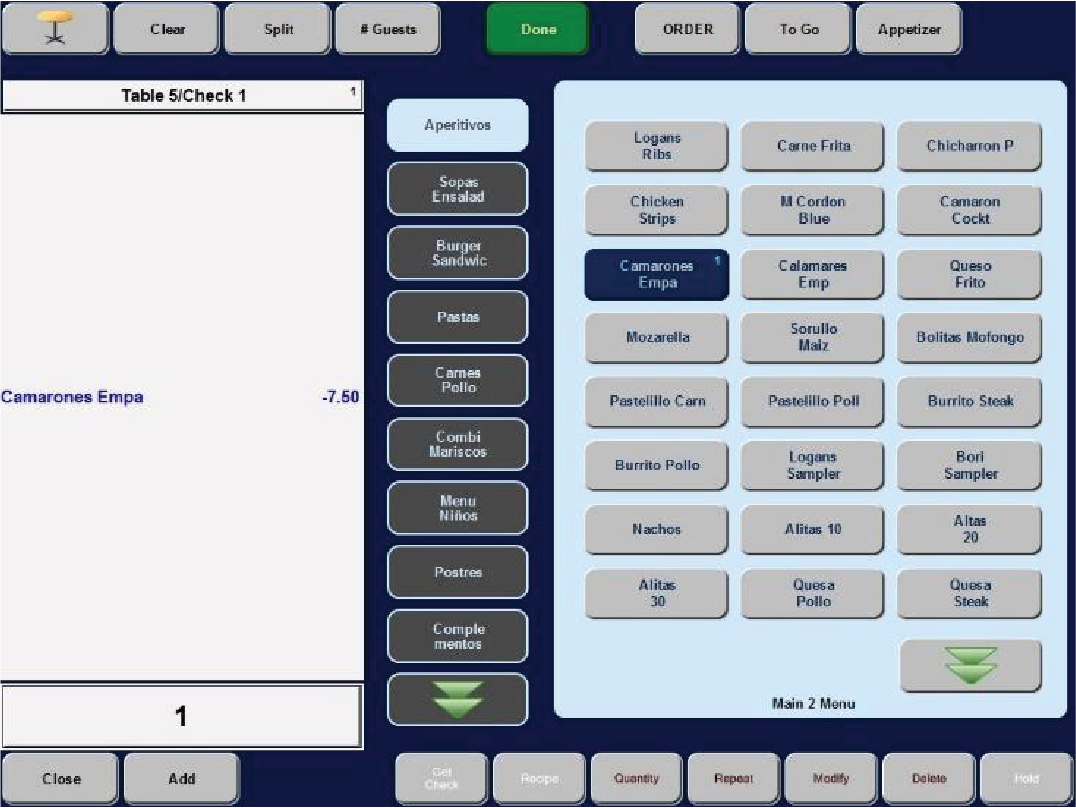
Point of Sale (POS)


Verifone Trinity Terminal

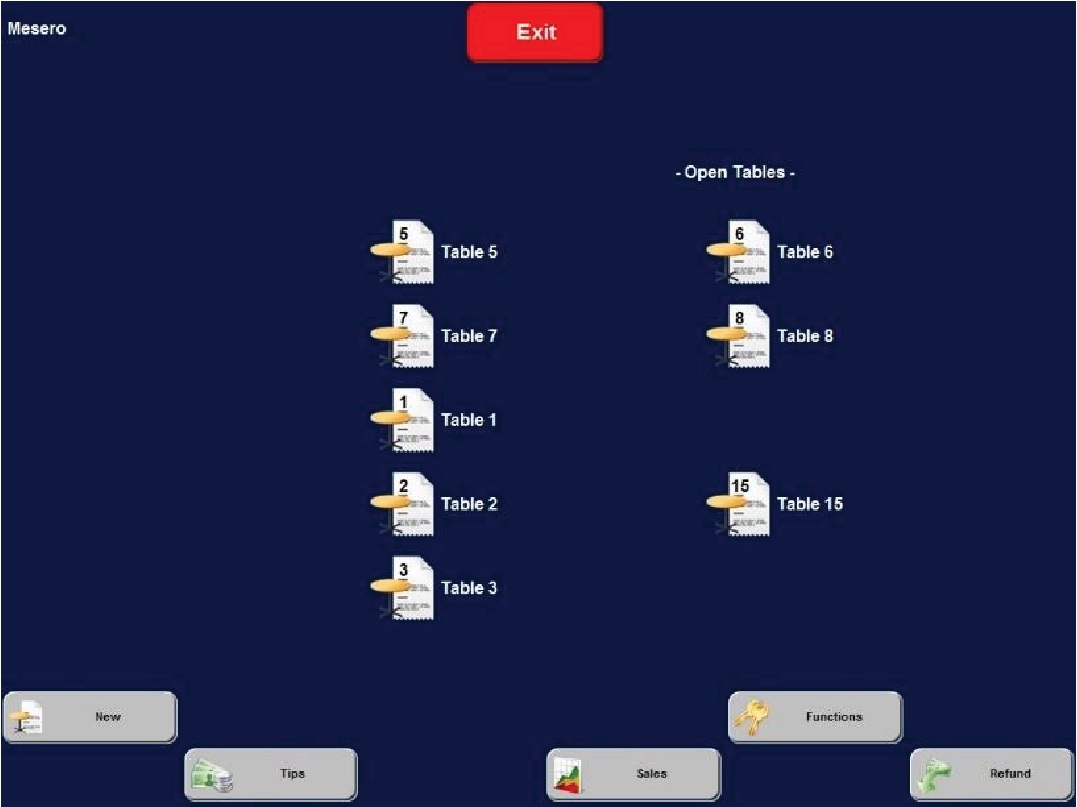
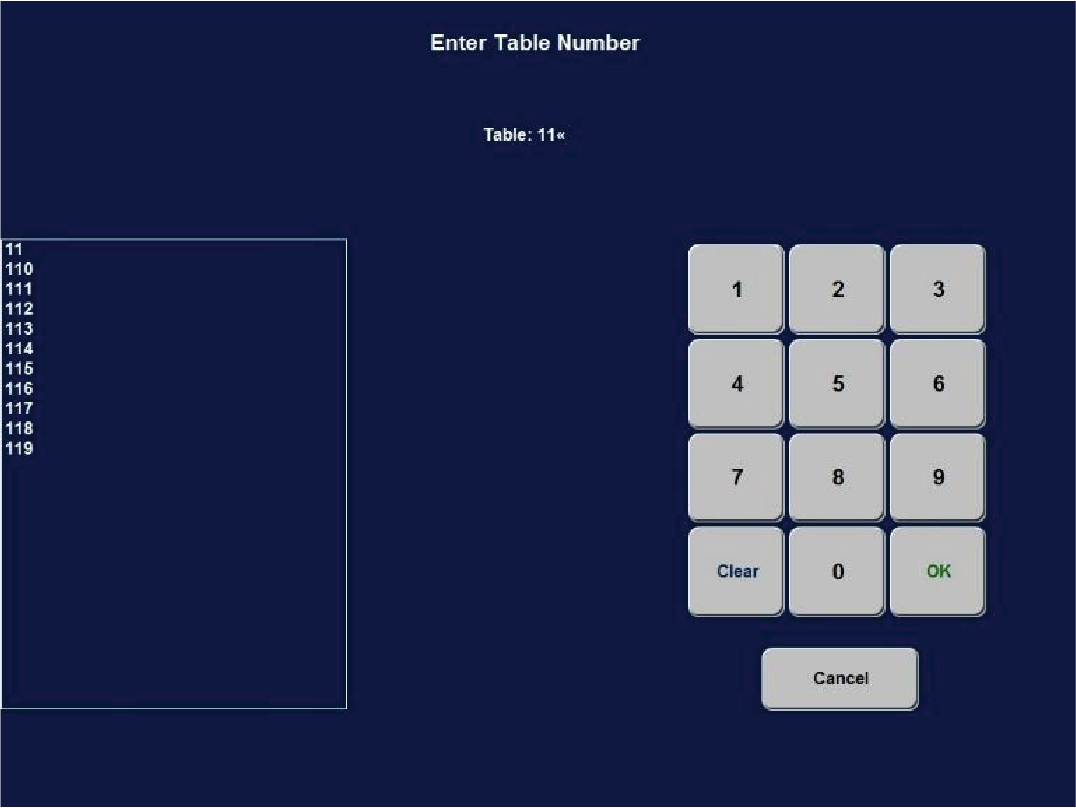
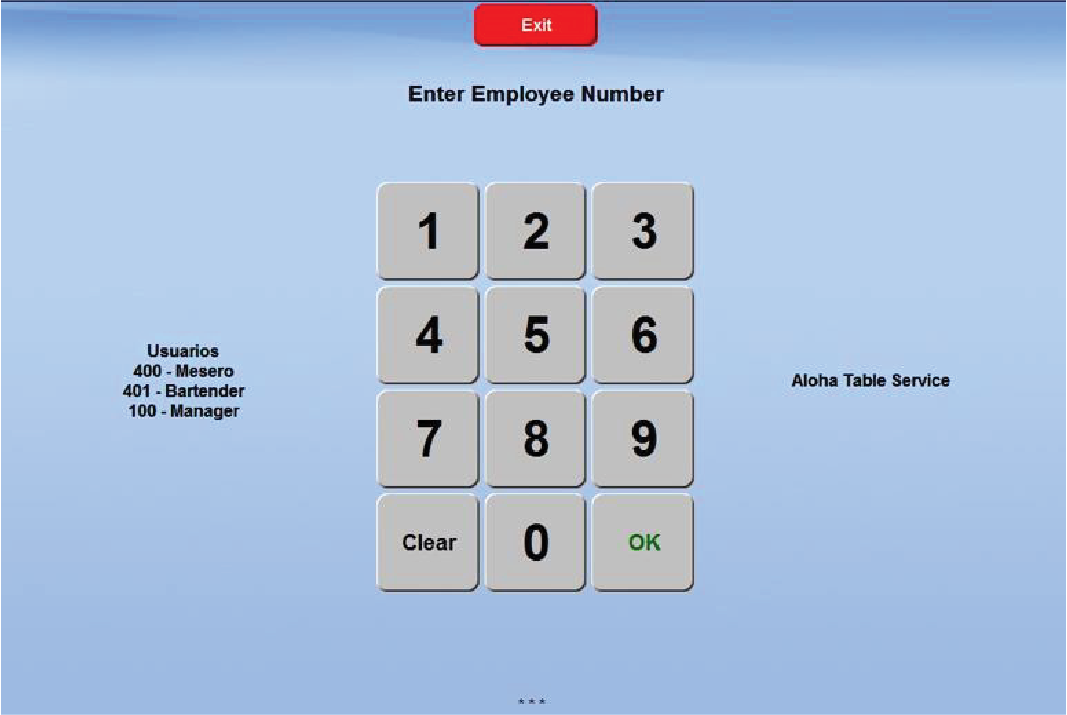
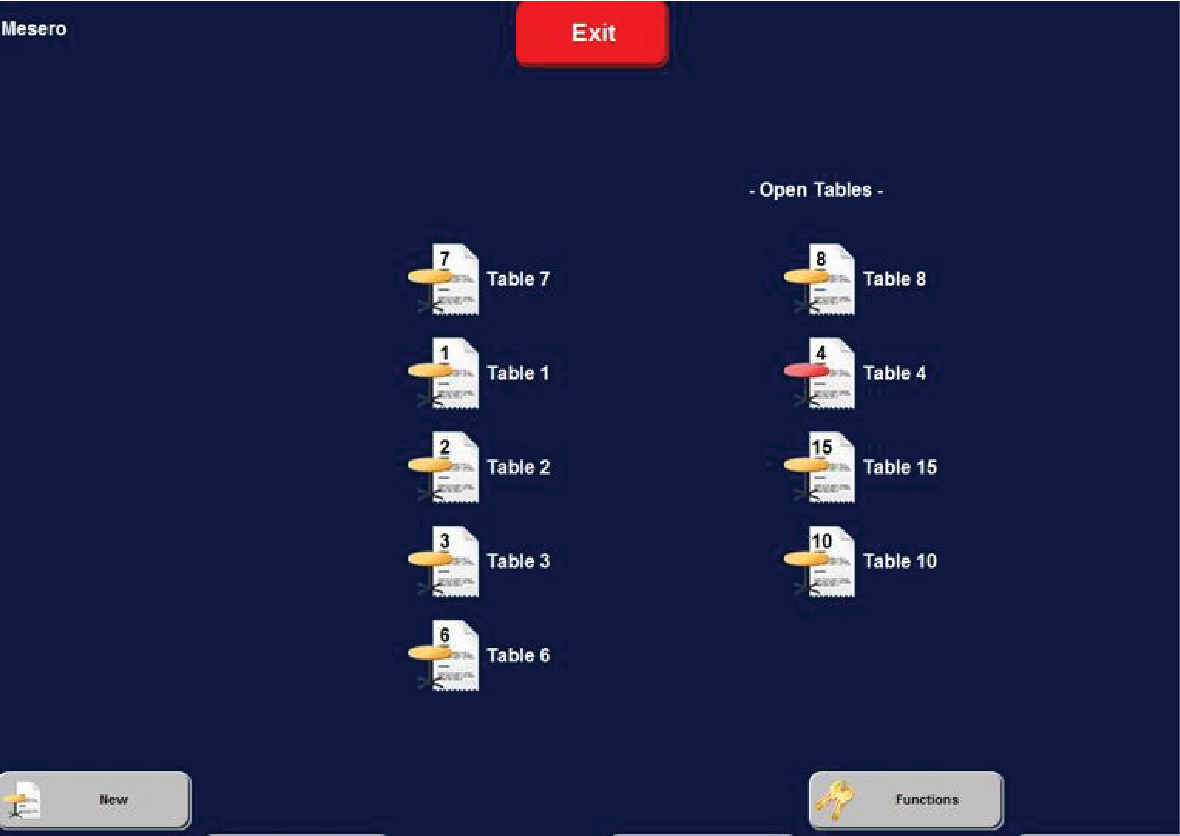
On the POS, enter the employee number on the main screen. Then, press OK to continue. Select the table for which payment has been completed. Then, press Close to finish closing the table.
Split Payment
This section will guide you through the steps to perform split payments on the Verifone Trinity terminal.


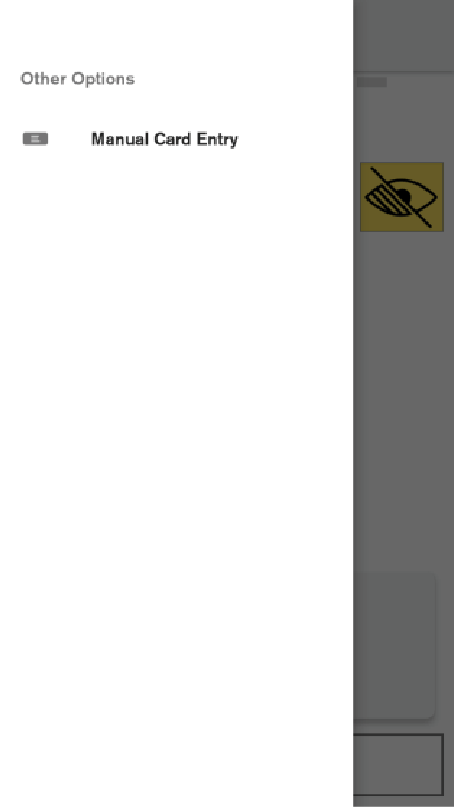
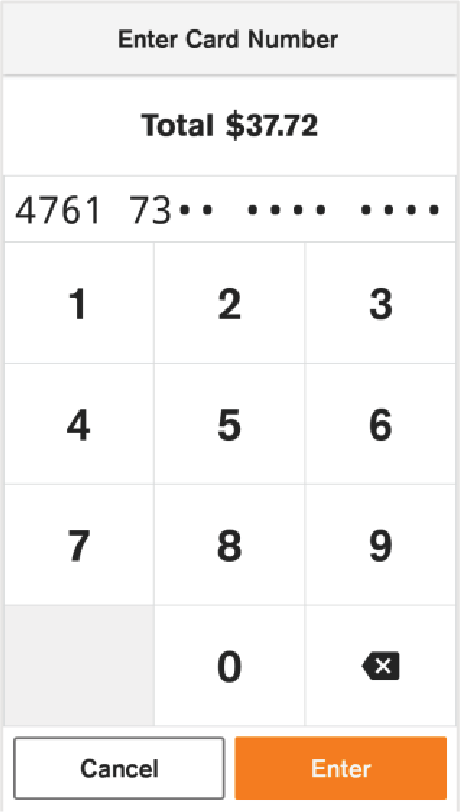
Transacción de Venta Manual
Below are the steps to perform a manual sale.
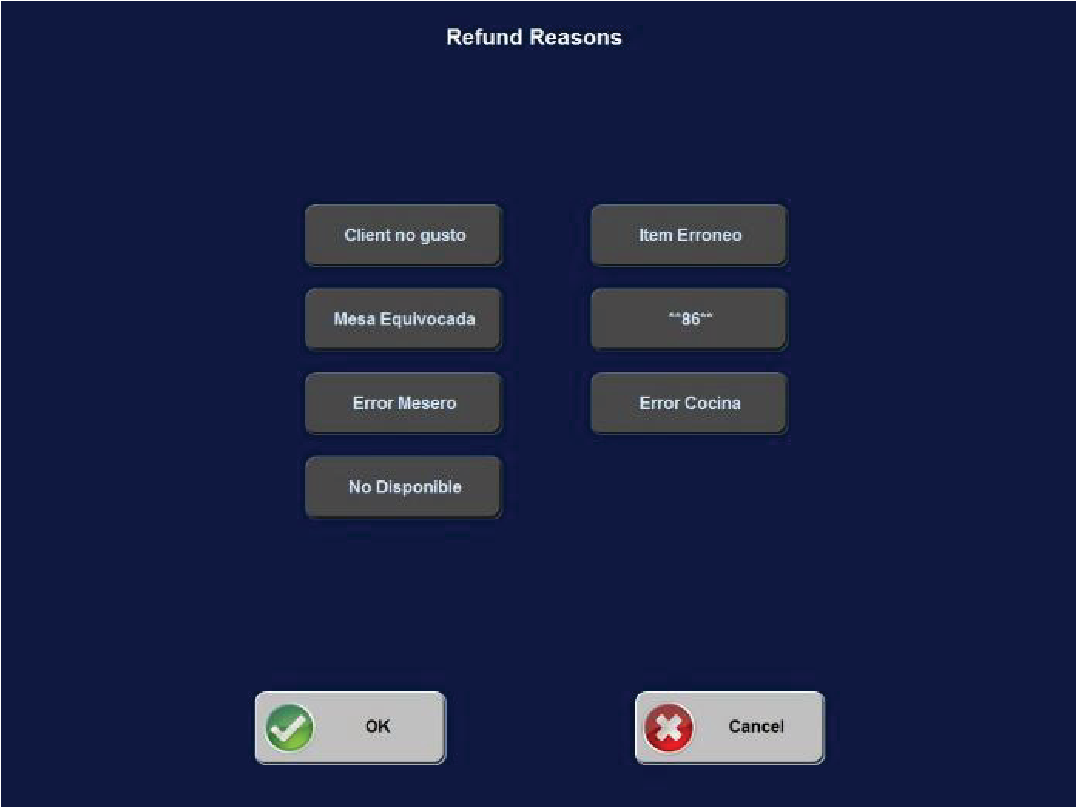
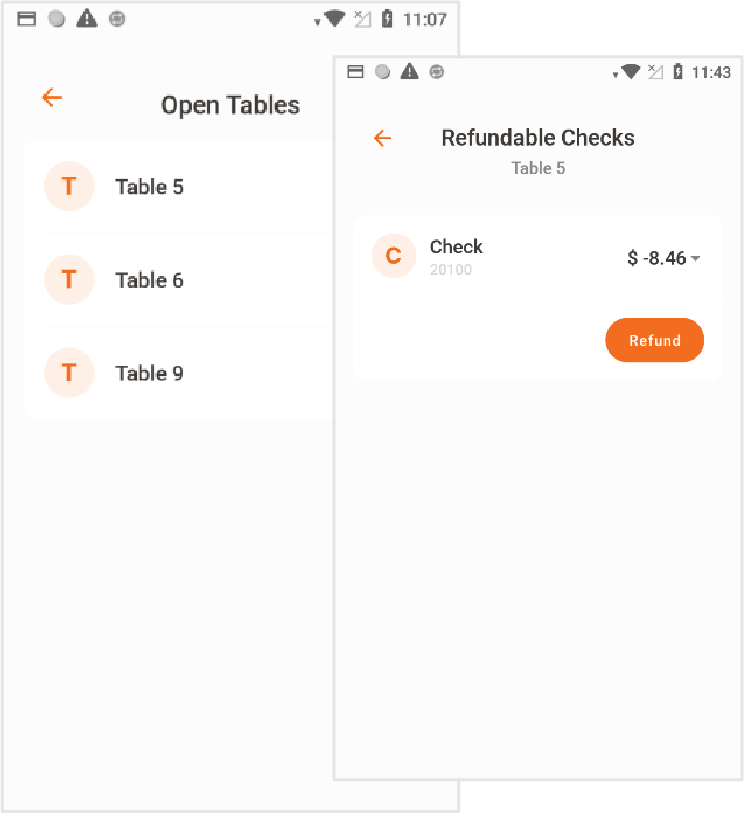
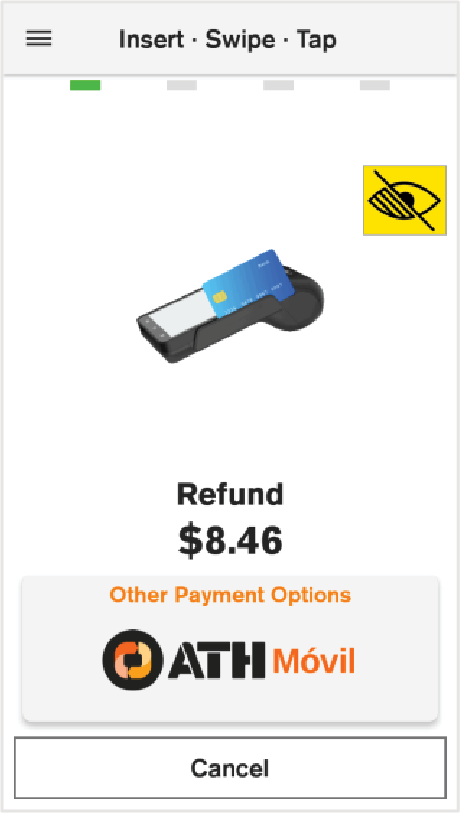
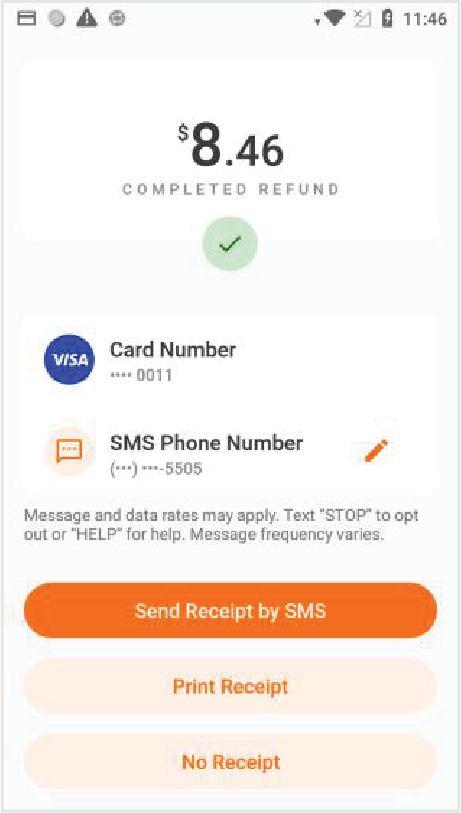
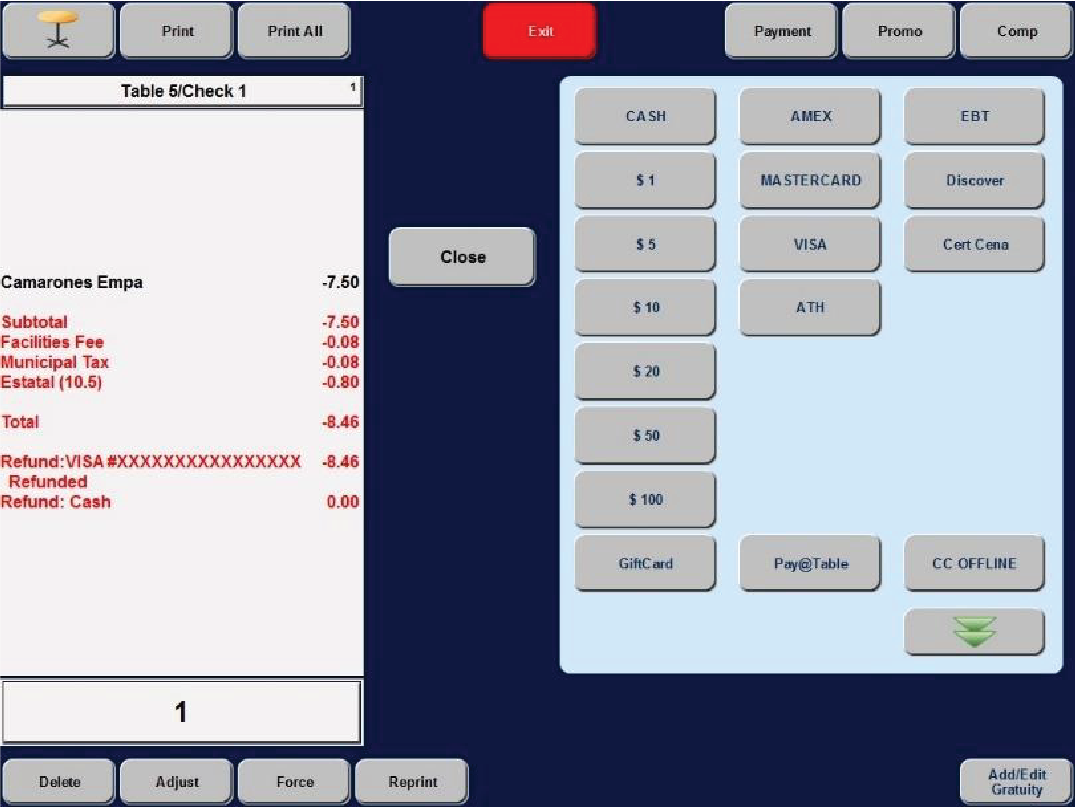
Refund
This section will guide you through the steps to issue a credit or debit card refund, as appropriate.
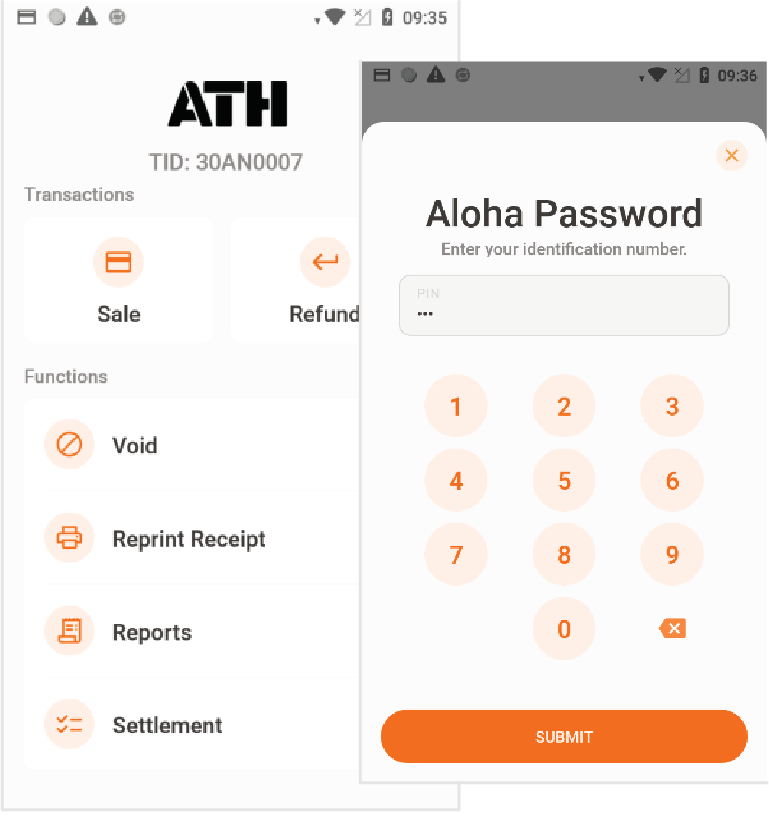
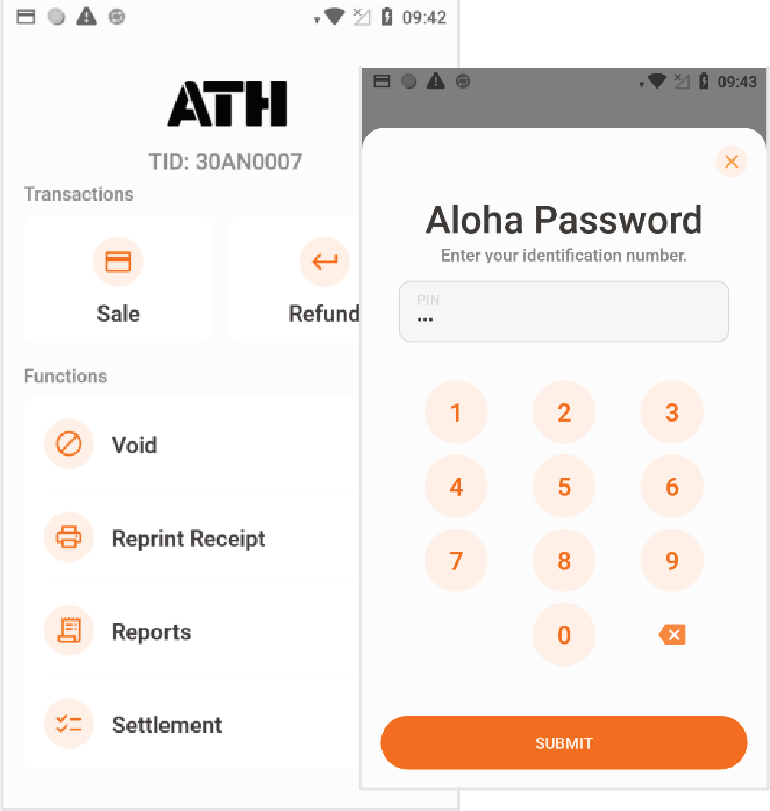
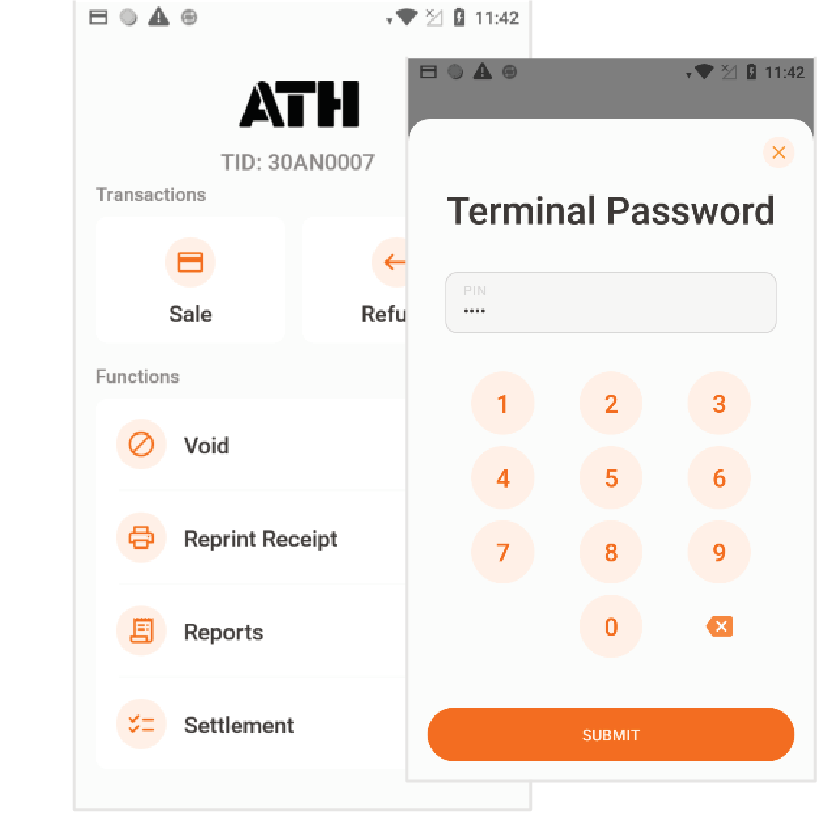
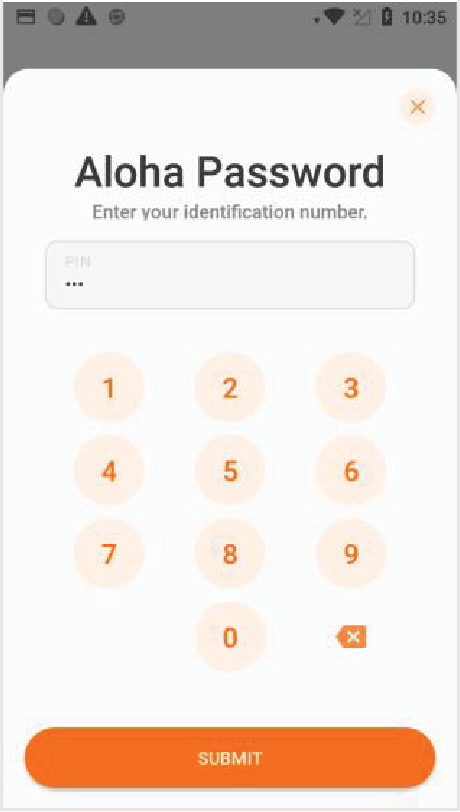
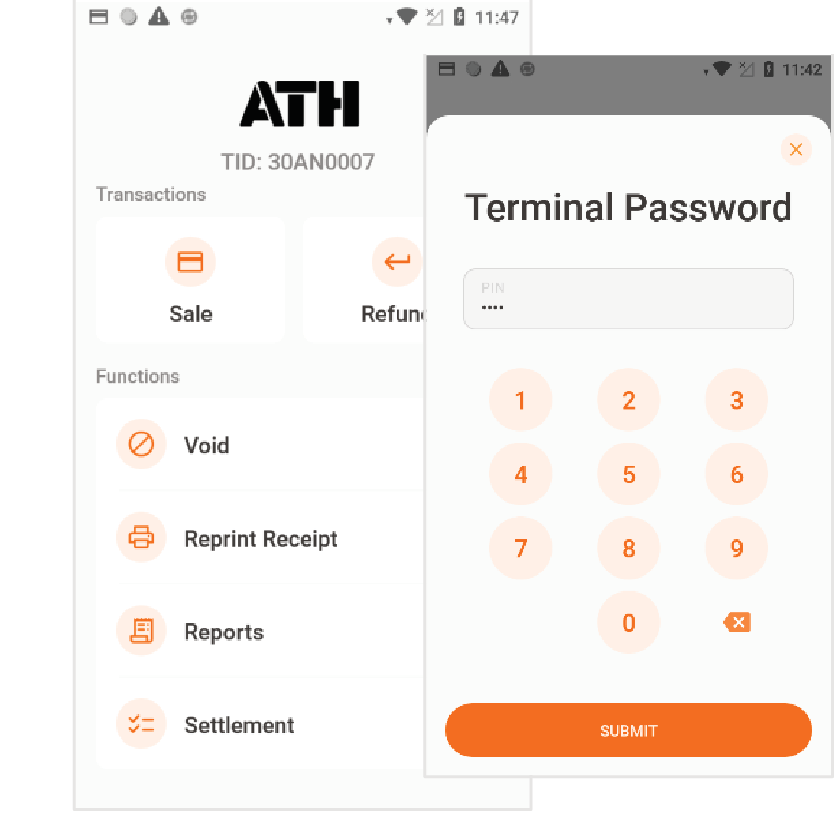
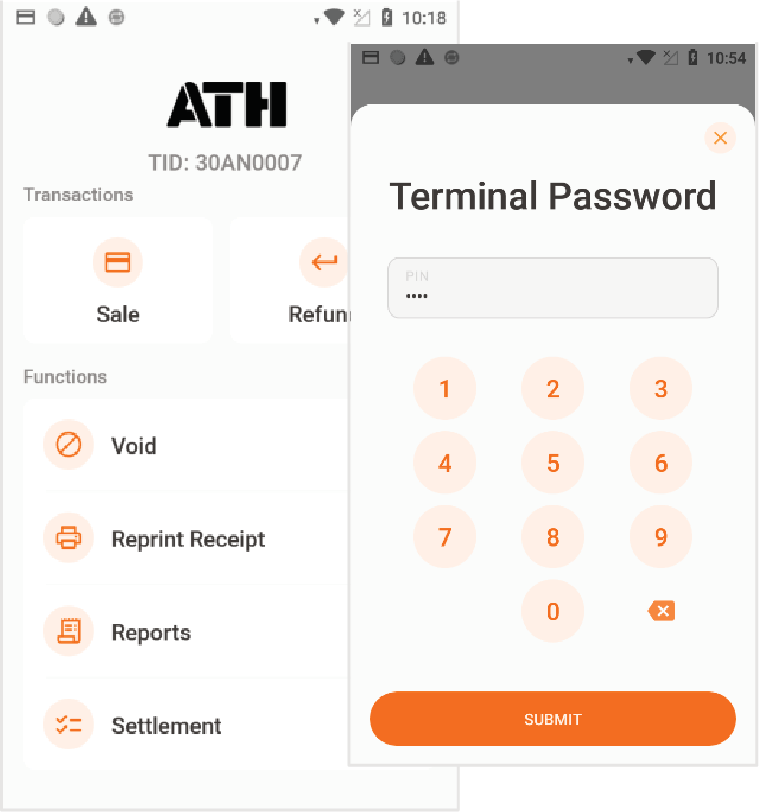
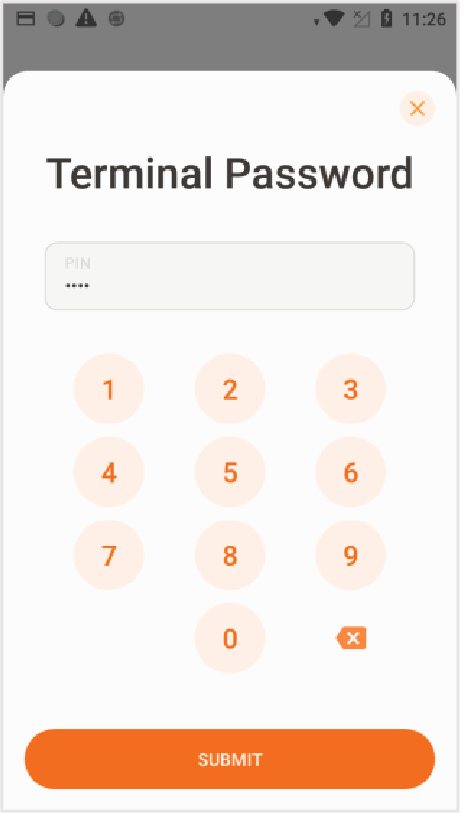
Note: The Verifone Trinity terminal will prompt you for a terminal password in order to access these functions.
Punto de Venta
Verifone Trinity Terminal
Point of Sale (POS)
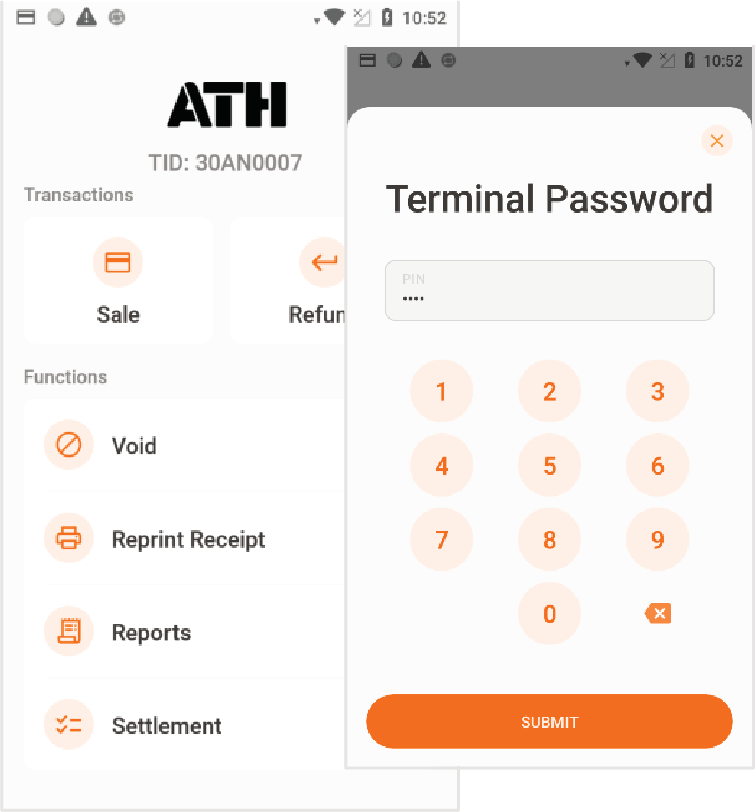
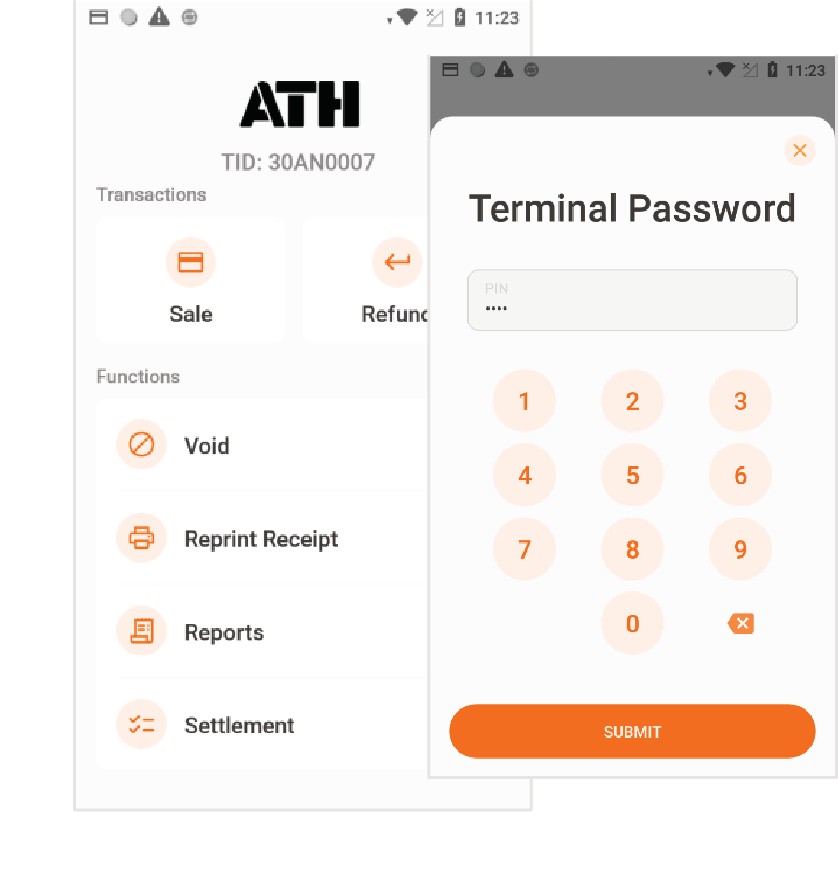
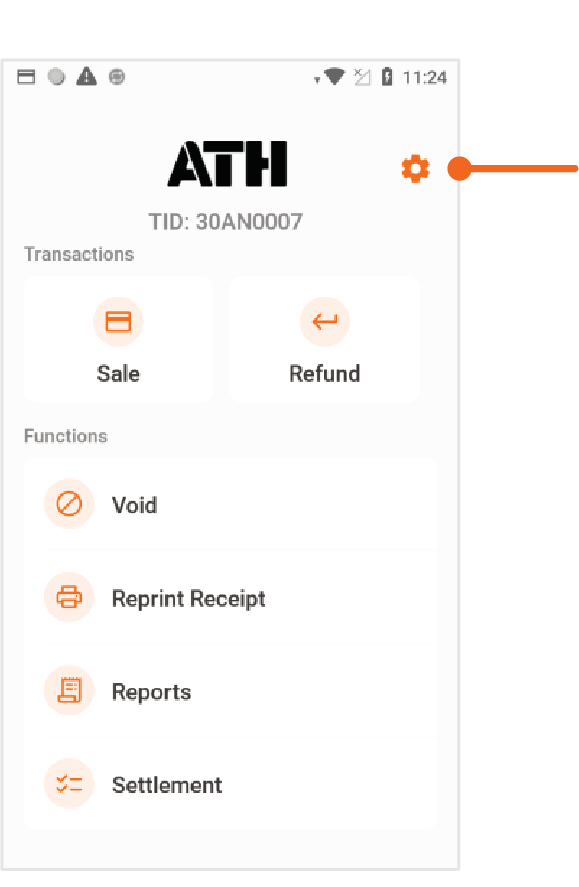
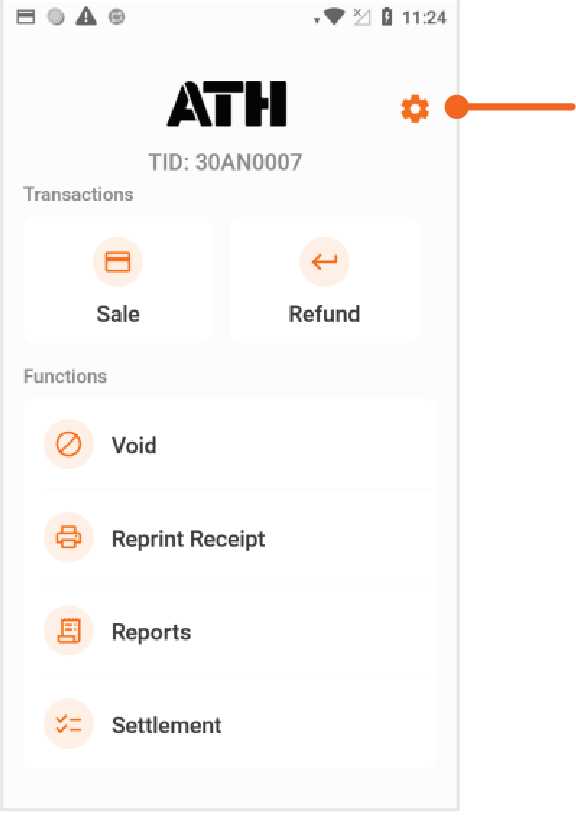
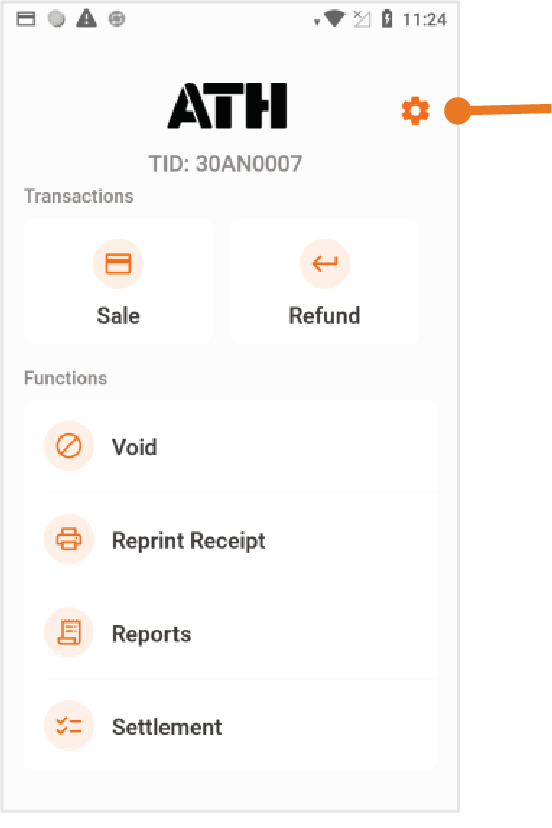
Functions
This section covers the following system functions: Void, Reprint Receipt, Reports, and Settlement
Note: The Verifone Trinity terminal will prompt you for a terminal password in order to access these functions.
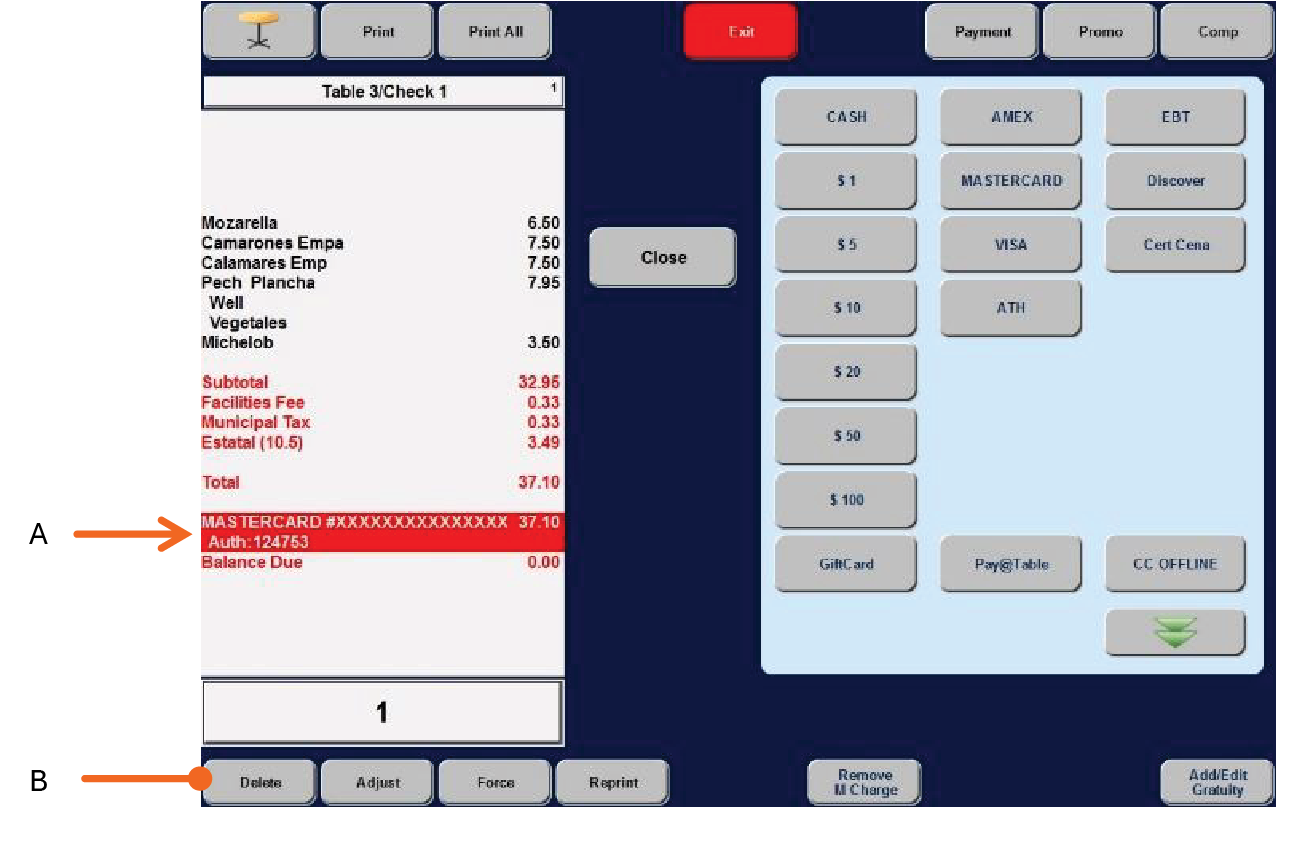
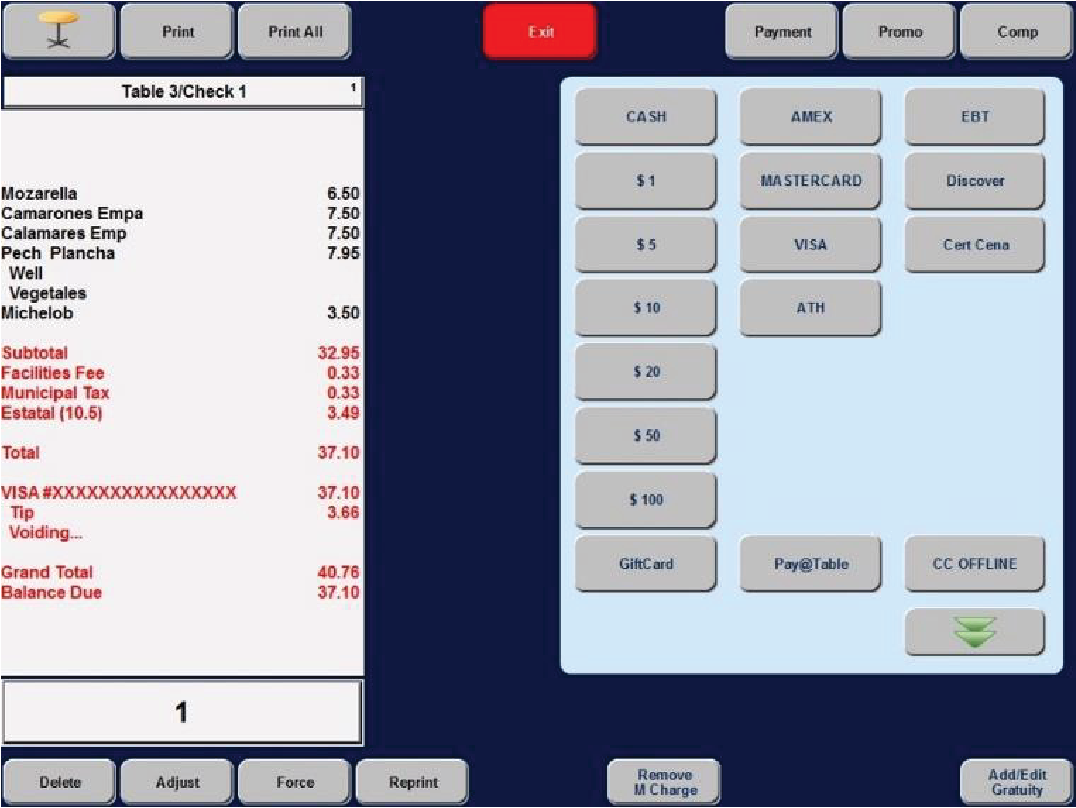
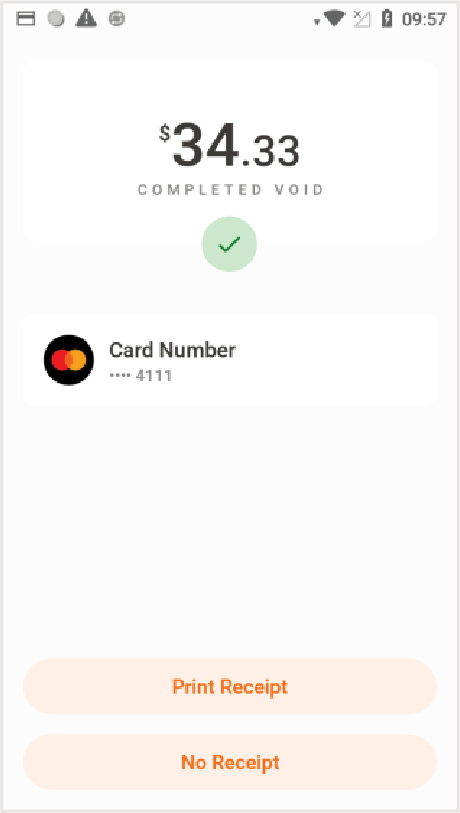
Void
Below are the steps to void a credit card transaction.
Point of Sale (POS)

Verifone Trinity Terminal

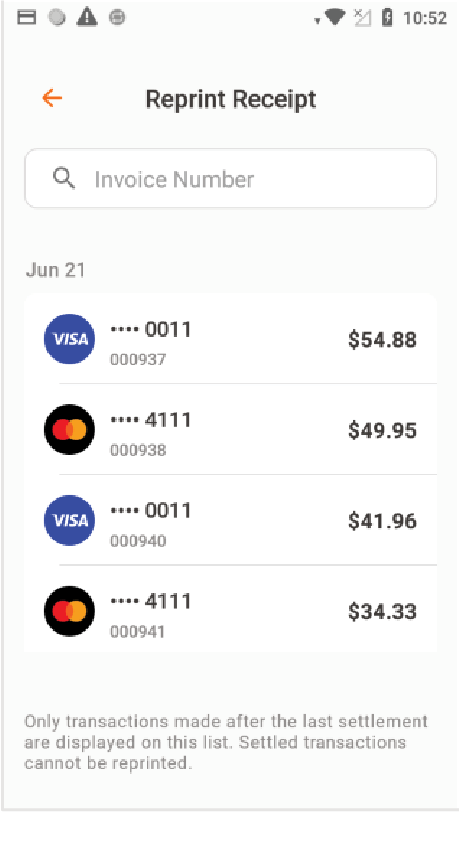
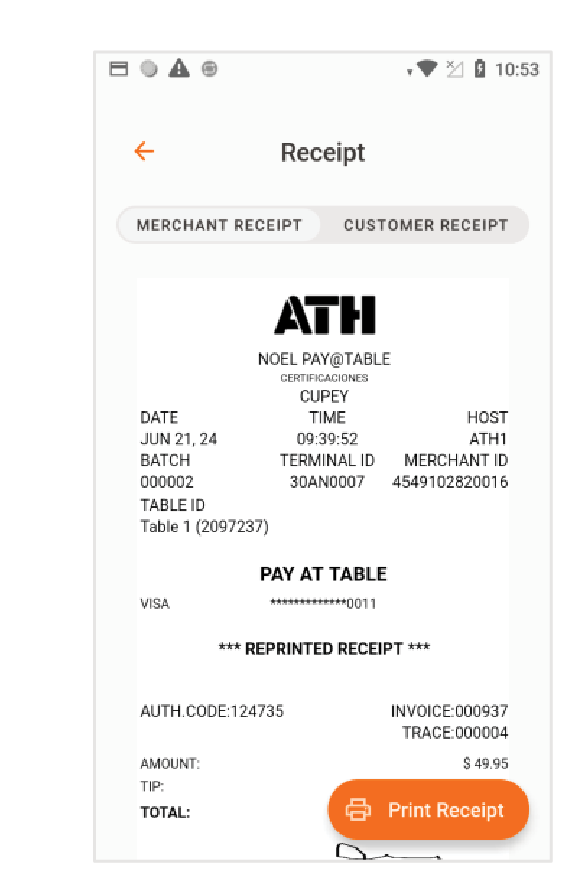
Reprint Receipt
Below are the steps to reprint merchant or customer receipts.
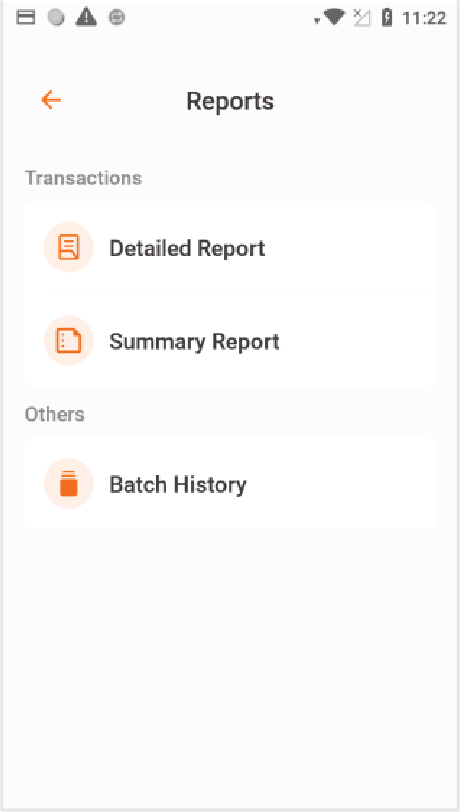
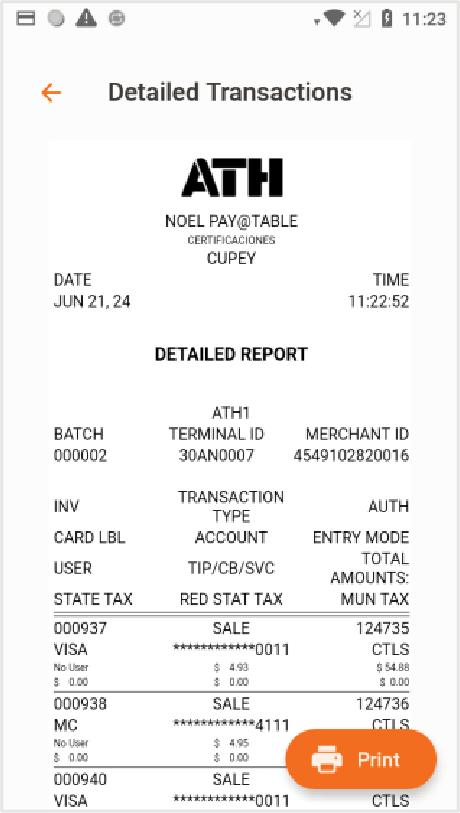
Reports
Below are the steps to view and print reports. You can select reports by transaction detail, summary, and more.
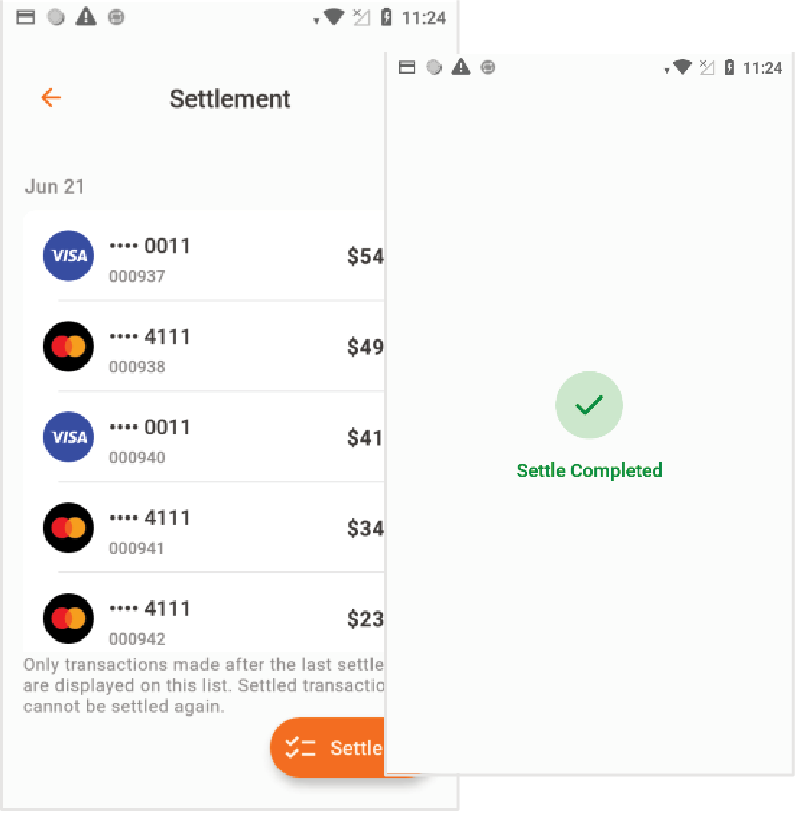
Settlement
Below are the steps to manually settle sales transactions.
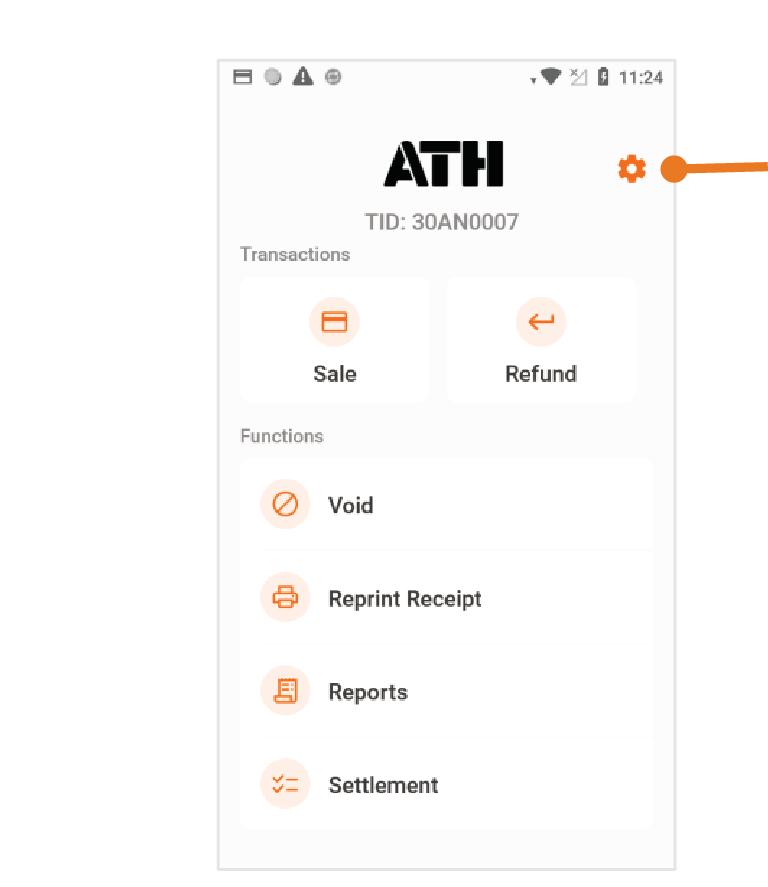
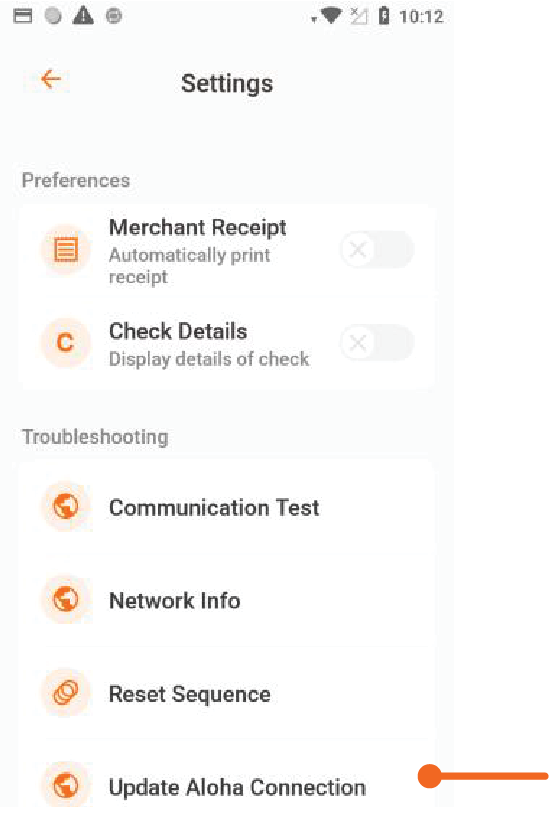
Settings
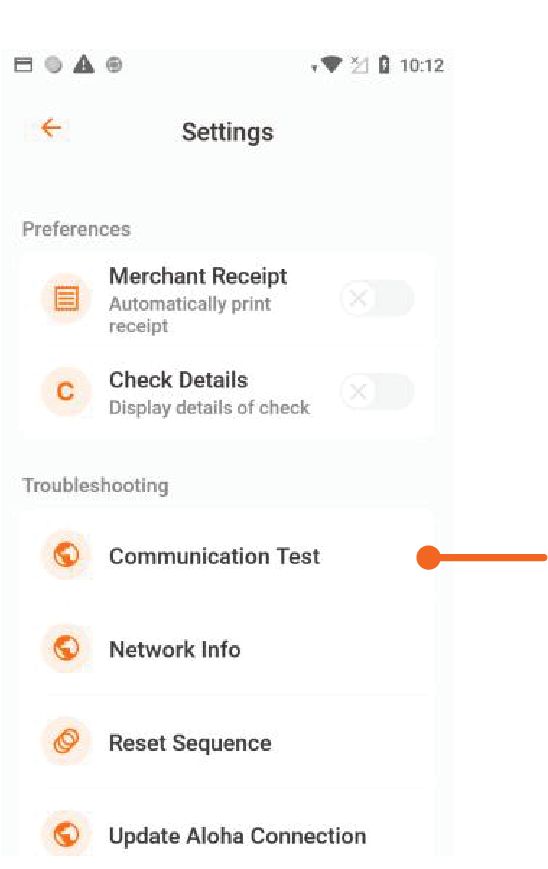
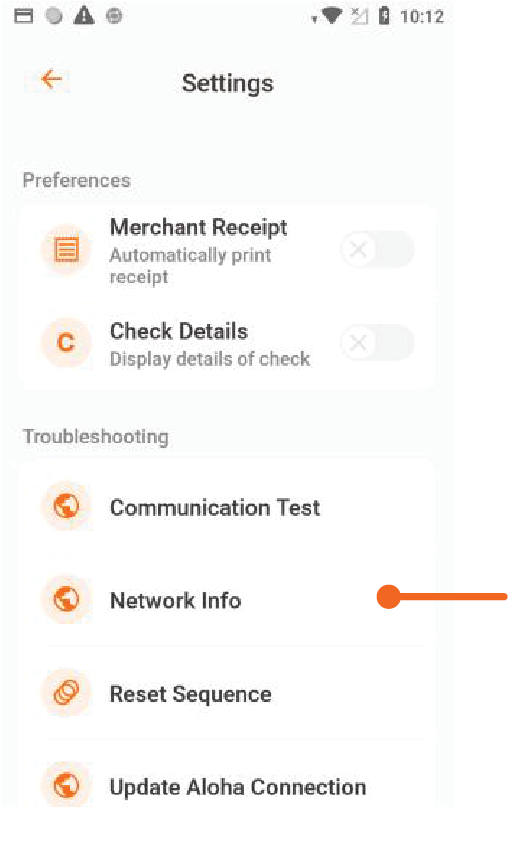
This section covers the settings to configure the PayAtTable application.
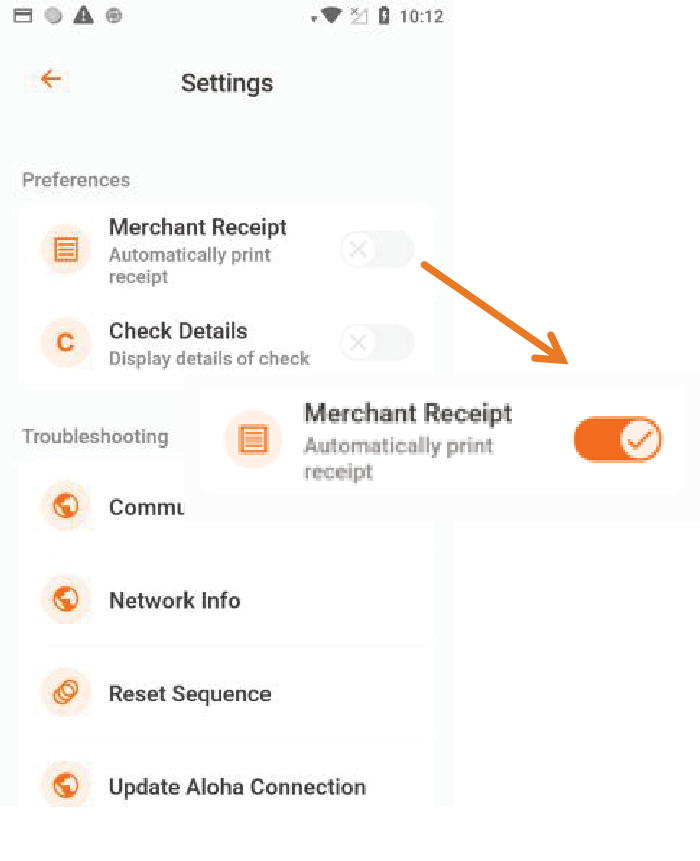
Preference
Merchant Receipt
This option allows you to enable and disable automatically printing the merchant receipt.
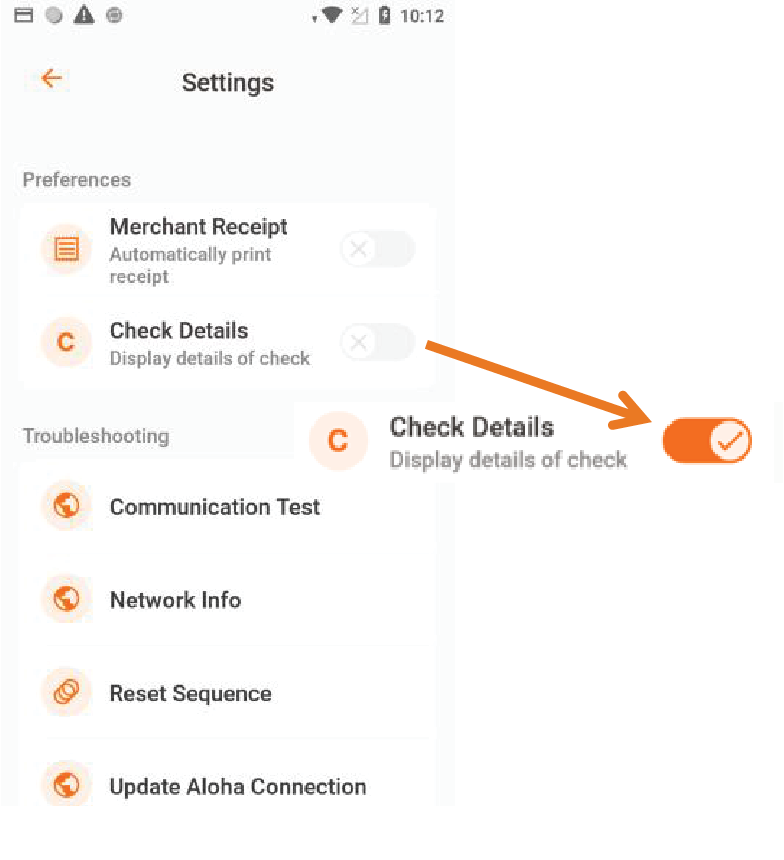
Check Details
This option allows you to enable or disable displaying check details on the sales screen.
Troubleshooting
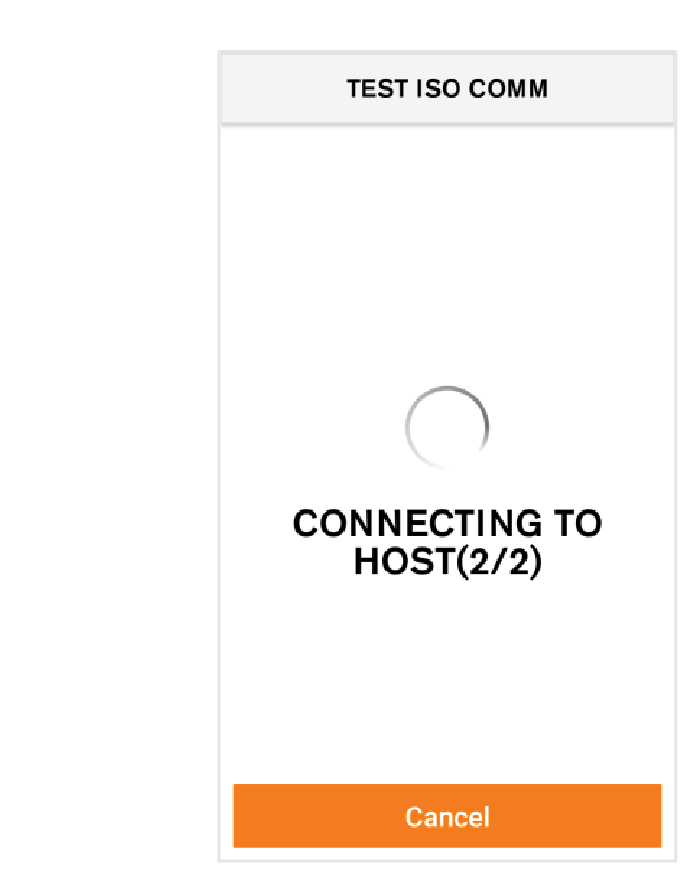
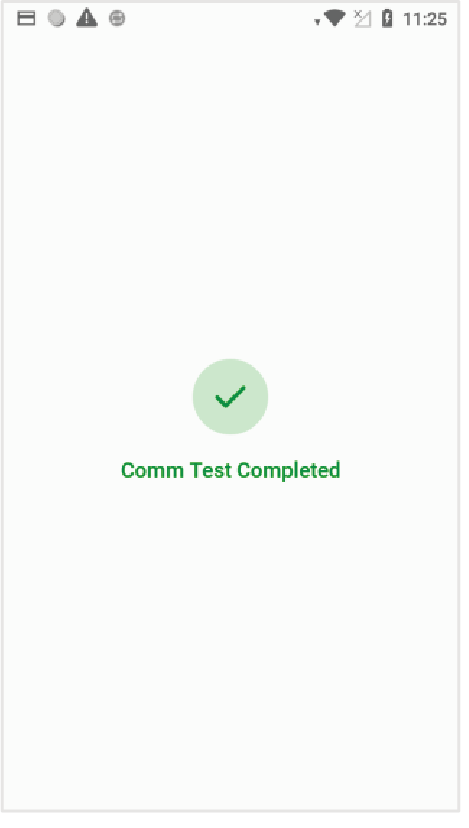
Communication Test
Follow the steps below to perform a communication test to verify that the POS terminal is connected to the Internet.
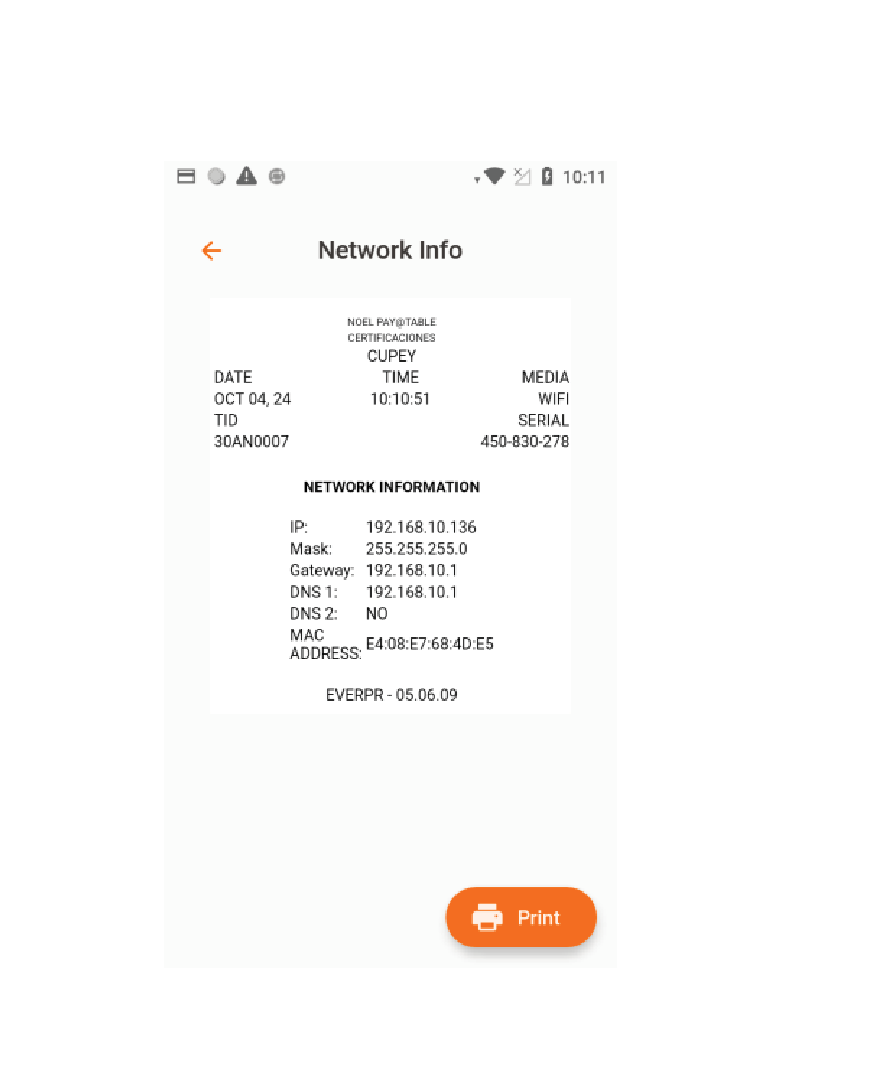
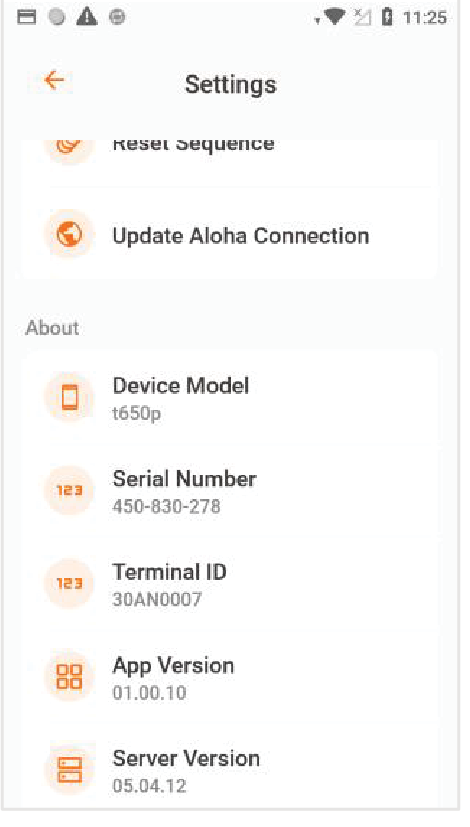
Network Info
This section describes how to access the network information.
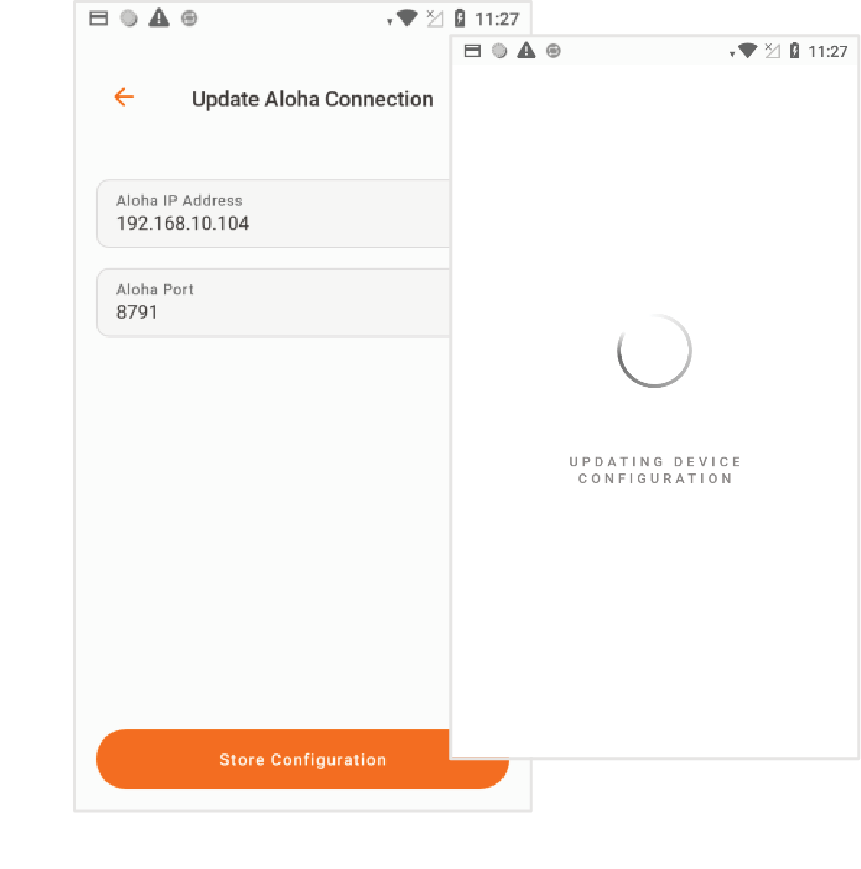
Update Aloha Connection

About
PayAtTable Troubleshooting
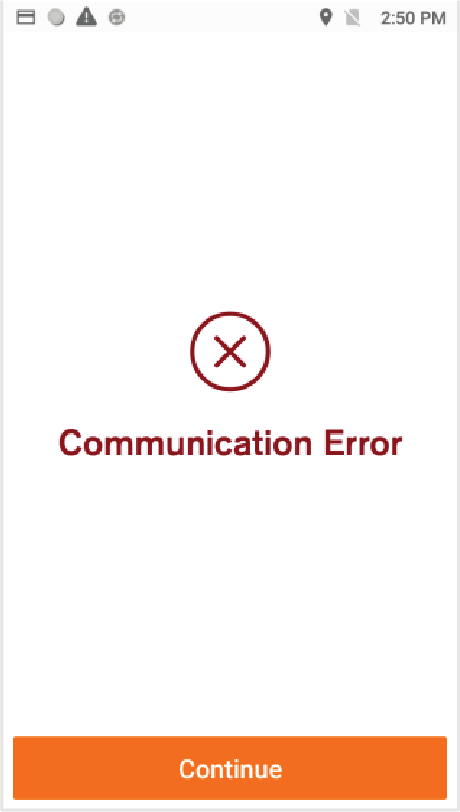
1. Verifone Trinity terminal communication problems.
| DESCRIPTION | DETAIL |
|---|---|
| Issue | The Verifone Trinity terminal cannot establish a connection with the Point of Sale or the payment host. |
| Cause | This may occur due to Wi-Fi network issues or if connection to the payment host is unavailable. |
| Solution | To check the Wi-Fi connection, go to the Internet Connection section of this guide. |
2. Table for Refund message.
| DESCRIPTION | DETAIL |
|---|---|
| Issue | When attempting to perform a Refund transaction, the Verifone Trinity terminal displays the message Table for Refund. |
| Cause | This may occur when the Sale option is mistakenly selected from the Verifone Trinity terminal main screen. |
| Solution | Process the refund transaction by selecting the Refund option from the Verifone Trinity terminal screen. |
3. Table for Sale message.
| DESCRIPTION | DETAIL |
|---|---|
| Issue | When attempting to perform a sale transaction, the Verifone Trinity terminal displays the message Table for Sale. |
| Cause | This may occur when the Refund option is mistakenly selected from the Verifone Trinity terminal main screen. |
| Solution | Process the sale transaction by selecting the Sale option from the Verifone Trinity terminal screen. |
4. The POS screen displays the message You are Currently Locked on Terminal APSInter1.
| DESCRIPTION | DETAIL |
|---|---|
| Issue | When the cashier tries to access the POS, it displays the message You are Currently Locked on Terminal APSInter1. |
| Cause | The POS screen displays this message when the same user is simultaneously logged into the Verifone Trinity system and a remote terminal. |
| Solution | Ensure that the user is logged out from the Verifone Trinity terminal. |
5. The Verifone Trinity terminal displays the message The employee is locked
| DESCRIPTION | DETAIL |
|---|---|
| Issue | When the cashier tries to access the Verifone Trinity terminal, it displays the message The employee is locked on another terminal. |
| Cause | The Verifone Trinity screen displays this message when the same user is simultaneously logged into the system from any of the Point of Sale terminals. |
| Solution | Ensure that the user is logged out from the Verifone Trinity terminal. |
6. The Verifone Trinity terminal displays the message No Voidable Checks when performing a Void.
| DESCRIPTION | DETAIL |
|---|---|
| Issue | When attempting to perform a Void transaction from the Verifone Trinity terminal, the screen displays the message No Voidable Checks. |
| Cause | The POS will display this error if there are no existing transactions to Void. |
| Solution | Once a transaction is selected for voiding at the POS, the user must complete the void transaction at the Verifone Trinity terminal before the transaction timeout occurs. If this error message appears, the user must to log into the POS again to delete the transaction and complete the Void process. |
7. The Verifone Trinity terminal displays the message No Tables Available.
| DESCRIPTION | DETAIL |
|---|---|
| Issue | The message No Tables Available is displayed when a server accesses the terminal using their credentials to check for open tables. |
| Cause | The Verifone Trinity terminal screen displays this message when a server has no open tables at the POS. |
| Solution | Open a table at the POS using the cashier's credentials. Then, verify that the Verifone Trinity terminal displays the information for the newly opened table. |
8. The Verifone Trinity terminal displays the message Could Not Find the Employee with the supplied ID.
| DESCRIPTION | DETAIL |
|---|---|
| Issue | When a server accesses the terminal with their credentials to check for open tables, the message Could Not Find the Employee with the supplied ID is displayed. |
| Cause | The Verifone Trinity terminal displays this message when the server information entered is incorrect or does not match an existing server in the list. |
| Solution | Enter the correct information for the intended server. |
9. The Verifone Trinity terminal displays the message Login Failed.
| DESCRIPTION | DETAIL |
|---|---|
| Issue | When a server accesses the terminal with their credentials to check for open tables, the message Login Failed is displayed. |
| Cause | The Verifone Trinity terminal screen displays this message when a server has not yet opened a shift in the POS. |
| Solution | Log into the POS and open a shift to start the day. |
10. No Wi-Fi signal on the Verifone Trinity terminal.
| DESCRIPTION | DETAIL |
|---|---|
| Issue | The Verifone Trinity terminal shows that there is no Wi-Fi signal available. |
| Cause | There may be a problem with the Wi-Fi connection, or the terminal may be displaying the signal status incorrectly. |
| Solution | To check the Wi-Fi connection, go to the Internet Connection section of this guide. |
11. The Verifone Trinity terminal displays the message Check Aloha Terminal, Was Payment Applied? when attempting to complete a sale transaction.
| DESCRIPTION | DETAIL |
|---|---|
| Issue | The Verifone Trinity terminal displays the message Check Aloha Terminal, Was Payment Applied? when a sale transaction is in the process of being completed. |
| Cause | The Verifone Trinity terminal may lose connection to the POS while completing a transaction. |
| Solution | Follow the steps shown on the Verifone Trinity terminal. Verify that the transaction was registered at the POS terminal and that the Verifone Trinity terminal is showing the status of the transaction. Press Yes on the Verifone Trinity terminal if the transaction was completed. The Verifone Trinity terminal will prompt you to enter the cashier's password for confirmation and will print a copy of the receipt to complete the transaction. Press No on the Verifone Trinity terminal if the transaction was not completed. The Verifone Trinity terminal will prompt you to enter the cashier's password to confirm and update the database. |
12. The Verifone Trinity terminal displays the message Check Aloha Terminal, Was Refund Applied? when attempting to complete a refund transaction.
| DESCRIPTION | DETAIL |
|---|---|
| Issue | When a refund transaction is in the process of being completed, the Verifone Trinity terminal displays the message Check Aloha Terminal, Was Refund Applied? |
| Cause | The Verifone Trinity terminal may lose connection to the POS while completing a transaction. |
| Solution | Follow the steps shown on the Verifone Trinity terminal. Verify that the transaction was registered by the POS terminal and that the Verifone Trinity terminal is showing the status of the transaction. Press Yes on the Verifone Trinity terminal if the transaction was completed. The Verifone Trinity terminal will prompt you to enter the cashier's password for confirmation and will print a copy of the receipt to complete the transaction. Press No on the Verifone Trinity terminal if the transaction was not completed. The Verifone Trinity terminal will prompt you to enter the cashier's password to confirm and update the database. |
13. The Verifone Trinity terminal displays the message Check Aloha Terminal, Was Void Applied? when attempting to complete a void transaction.
| DESCRIPTION | DETAIL |
|---|---|
| Issue | When a Void transaction is in the process of being completed, the Verifone Trinity terminal displays the message Check Aloha Terminal, Was Void Applied? |
| Cause | The Verifone Trinity terminal may lose connection to the POS while completing a transaction. |
| Solution | Follow the steps shown on the Verifone Trinity terminal. Verify that the transaction was registered by the POS terminal and that the Verifone Trinity terminal is showing the status of the transaction. Press Yes on the Verifone Trinity terminal if the transaction was completed. The Verifone Trinity terminal will prompt you to enter the cashier's password for confirmation and will print a copy of the receipt to complete the transaction. Press No on the Verifone Trinity terminal if the transaction was not completed. The Verifone Trinity terminal will prompt you to enter the cashier's password to confirm and update the database. |
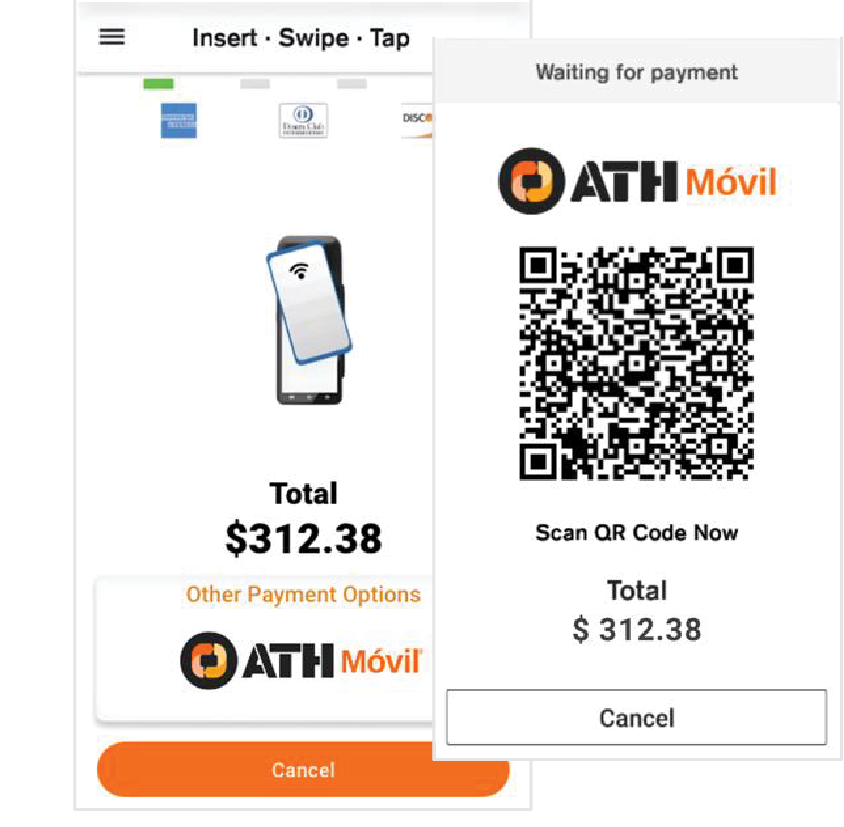
14. The Verifone Trinity terminal displays the message Check Aloha Terminal, Was Payment Applied? when attempting to complete a sale transaction with ATH Móvil.
| DESCRIPTION | DETAIL |
|---|---|
| Issue | The Verifone Trinity terminal displays the message Check Aloha Terminal, Was Payment Applied? when a sale transaction is in the process of being completed. |
| Cause | The Verifone Trinity terminal may lose connection to the POS while completing a transaction. |
| Solution | Follow the steps shown on the Verifone Trinity terminal. Verify that the transaction was registered at the POS terminal and that the Verifone Trinity terminal is showing the status of the transaction. Press Yes on the Verifone Trinity terminal if the transaction was completed. The Verifone Trinity terminal will prompt you to enter the cashier's password for confirmation and will print a copy of the receipt to complete the transaction. Press No on the Verifone Trinity terminal if the transaction was not completed. The Verifone Trinity terminal will prompt you to enter the cashier's password to confirm and update the database. |
15. The Verifone Trinity terminal displays the message Check Aloha Terminal, Was Refund Applied? when attempting to complete a refund transaction with ATH Móvil.
| DESCRIPTION | DETAIL |
|---|---|
| Issue | When a refund transaction is in the process of being completed, the Verifone Trinity terminal displays the message Check Aloha Terminal, Was Refund Applied? |
| Cause | The Verifone Trinity terminal may lose connection to the POS while completing a transaction. |
| Solution | Follow the steps shown on the Verifone Trinity terminal. Verify that the transaction was registered by the POS terminal and that the Verifone Trinity terminal is showing the status of the transaction. Press Yes on the Verifone Trinity terminal if the transaction was completed. The Verifone Trinity terminal will prompt you to enter the cashier's password for confirmation and will print a copy of the receipt to complete the transaction. Press No on the Verifone Trinity terminal if the transaction was not completed. The Verifone Trinity terminal will prompt you to enter the cashier's password to confirm and update the database. |
16. Server is unable to log into the Verifone Trinity terminal or the POS
| DESCRIPTION | DETAIL |
|---|---|
| Issue | The server cannot log into the POS after the Verifone Trinity terminal displays a Login Failed error. |
| Cause | The Verifone Trinity terminal lost the connection and was unable to report the log off status to the POS. |
| Solution | Wait a few seconds until the timeout expires for the POS to release the connection session with the Verifone Trinity terminal. |
17. The Verifone Trinity terminal displays the message Transaction Timeout when attempting to complete a transaction.
| DESCRIPTION | DETAIL |
|---|---|
| Issue | The Verifone Trinity terminal displays the message Transaction Timeout and does not allow you to continue with the transaction process. |
| Cause | While performing a transaction, the server takes too long to proceed to the next step in the transaction process. The time limit is reached and the connection session is cancelled. |
| Solution | Press Cancel to return to the main screen. Re-enter the cashier's information into the Verifone Trinity terminal to start the transaction. |
18. The Verifone Trinity terminal displays the message Low Battery
| DESCRIPTION | DETAIL |
|---|---|
| Issue | The Verifone Trinity terminal screen shows the message Low Battery. |
| Cause | The terminal is wireless and battery powered. After prolonged use, the battery may lose its charge. |
| Solution | It is recommended to connect the terminal to the charger when not in use. The terminal can continue to operate once connected to the charger. |
19. The Verifone Trinity terminal displays the message Trans Not Allowed when attempting to perform a void transaction.
| DESCRIPTION | DETAIL |
|---|---|
| Issue | The Verifone Trinity terminal displays Trans Not Allowed when attempting to perform a void transaction. |
| Cause | It is likely that the wrong Void transaction option was selected. |
| Solution | Make sure to select the Void option. |
20. The Verifone Trinity terminal screen displays the message Amount exceeds total balance when entering an amount for a partial payment.
| DESCRIPTION | DETAIL |
|---|---|
| Issue | The Verifone Trinity terminal displays the message Amount exceeds total balance when the amount for a partial payment is entered. |
| Cause | The amount entered is greater than the total amount for the table. |
| Solution | Enter an amount that is less than the total amount of the sale, or select the Pay in Full option to pay the full amount for the table’s total sale. |